In mid-January of this year, we returned to l’Aquila, Italy to teach a Google Building Maker workshop, in further support of the post-earthquake 3D digital reconstruction effort of the city. If you are not familiar with this Google-assisted effort, you can read all about it (or just watch the video below).
While we were there, we had the chance to meet many users that are actively working on the project, and see several of their amazing models. These models allow an “at-a-glance” look at the current situation of the city. Most of the models reproduce the city as it is now, including the damage to the various structures; they provide a precious resource to evaluate current and future reconstruction projects in the city.
Modeling Progress: On the left are geo-models that existed before the Google workshops. On the right are models currently visible in Google Earth.
SketchUp model and picture (inset) of the S. Pietro di Coppito (XIII century) after the earthquake.
SketchUp model and picture (inset) of Santa Maria del Suffragio (XVIII century) after the earthquake.
If you are interested in lending a hand, you can use Building Maker to create simple geo-models. If you’d like to dive in a little deeper, you can use SketchUp in connection with the many photos and other information on the project website.
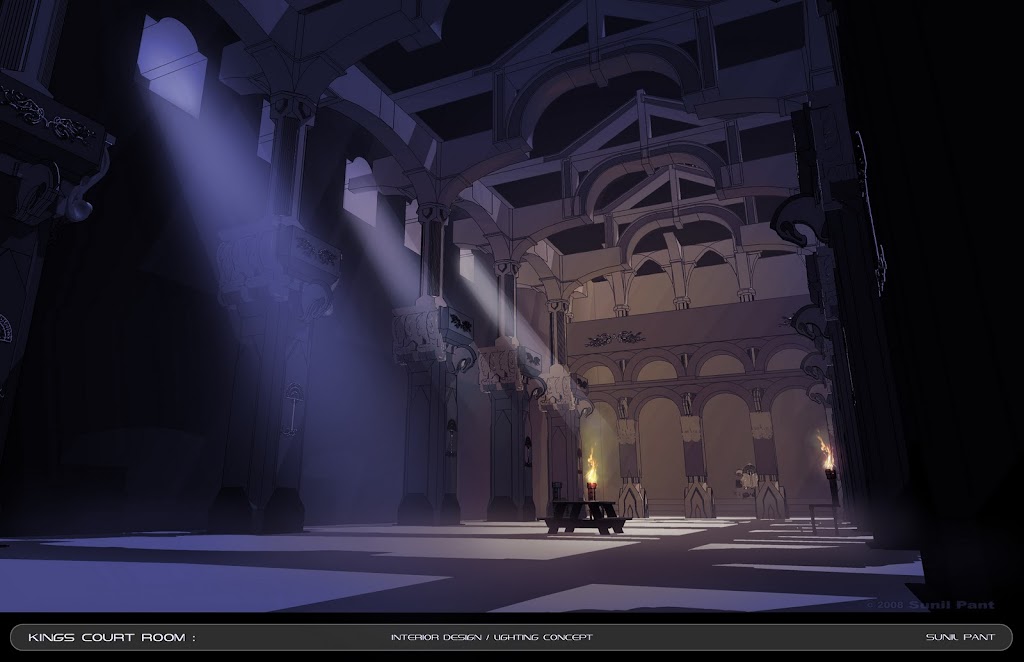
Sunil Pant, friend of SketchUp and eminent 3D modeling ninja, is teaching an online workshop next week through CG society. It’s called 3D Design and modeling for pre-production using Google SketchUp. Sunil has been a concept artist in the motion picture and video game industry for over 4 years, working with George Hull and other luminaries. His credits include Iron Man 2 and Dreamwork’s Megamind. We profiled Sunil on our blog a few months back.
King’s Court Room
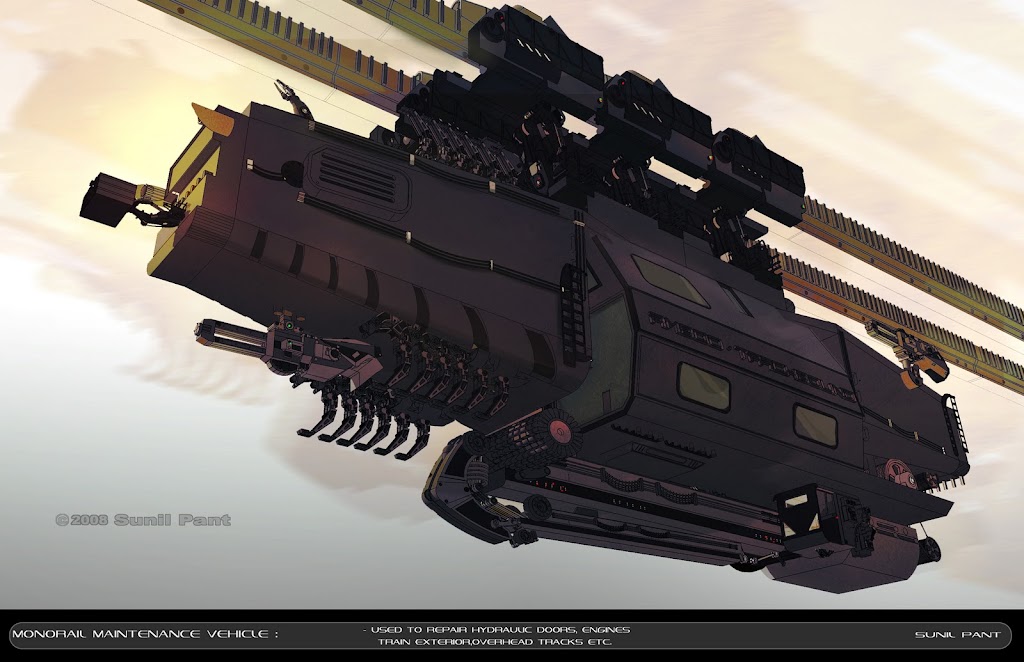
In this course, Sunil will go into detail about how he uses SketchUp to quickly block out designs in 3D in order to work out issues relating to proportion and scale. Over the 8 week course, attendees will learn how to design complicated props and vehicle designs like this:
Monorail Maintenance Vehicle
The online course starts on Monday and runs through April.
Somewhere near the top of SketchUp’s all-time list of feature requests, there’s a big, bold headline that reads ANIMATE THE MOVEMENT OF OBJECTS. It’s something all of us have wanted to do at one time or another. Unfortunately, it’s also not something we’ve managed to tackle just yet. And that’s why Ruby script plugins for SketchUp are so darn useful.
A while ago, I found out about a nice little plugin called Proper Animation. Watching the teaser video (below) inspired me to model and animate my very own robotic contraption. Shockingly, it only took me about half and hour to do; Proper Animation is refreshingly easy to figure out and use.
This script’s premise is that objects in your model—groups and components—can each have multiple positions. You manually assign each position to build an animation. Playing that animation involves using SketchUp’s already-existing Scenes feature. The really nice thing is that Proper Animation automatically connects positions to scenes.
The first thing you need to do is download and install the plugin. Its developer is MorisDov; you can find it on his site. Proper Animation also comes bundled with its own tutorial PDF. If you’re looking for even more encouragement/inspiration/support, you can check out the plugin’s SketchUcation thread.
Here’s how I recommend getting started with Proper Animation:
Step 1
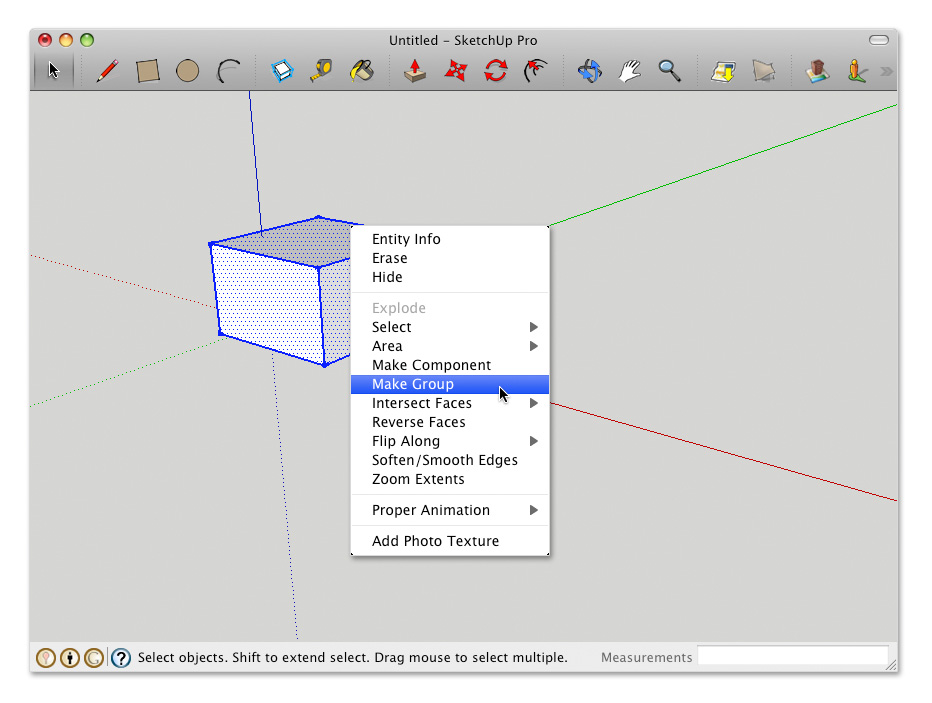
Build a box and turn it into a group. This plugin only works with groups and components.
Step 2
Right-click the box and choose Proper Animation > Set Position – 1. This tells the plugin where the box should start out.
Step 3
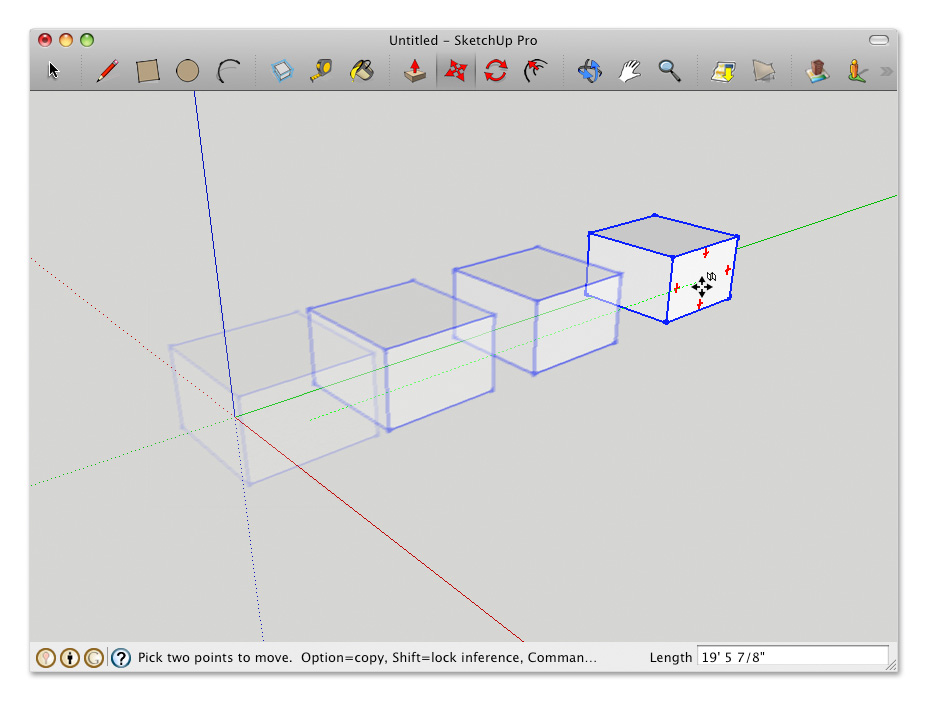
Move the box using SketchUp’s Move tool. It doesn’t matter where you move it to.
Step 4
Right-click the box again and choose Proper Animation > Set Position – 2.
Step 5
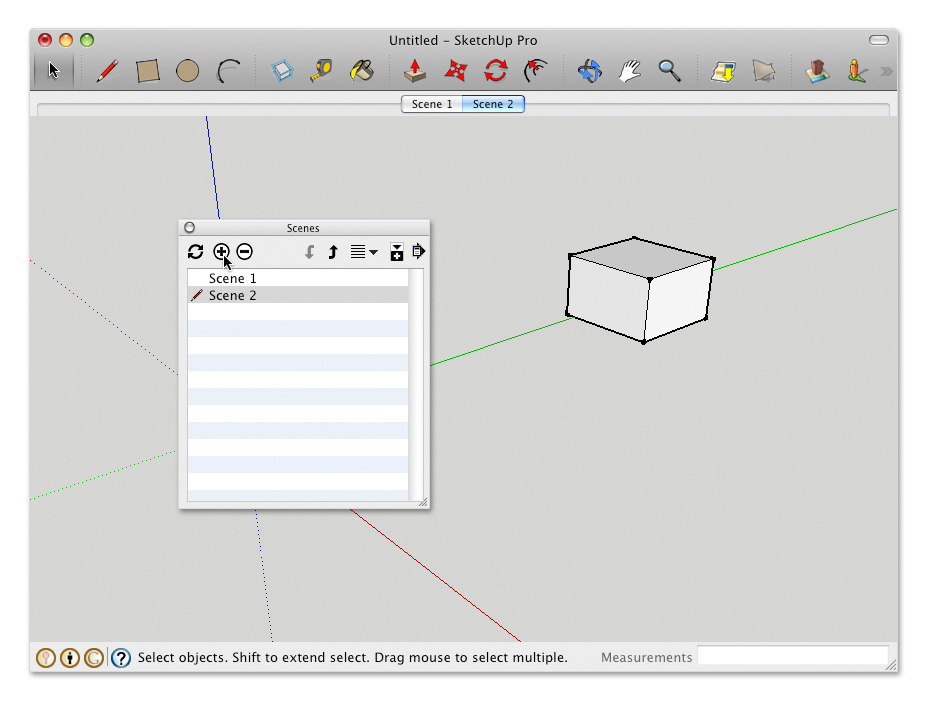
Open the Scenes Manager (Window > Scenes) and create a couple of new scenes. Clicking the Add Scene button twice is the quickest way to do this.
Step 6
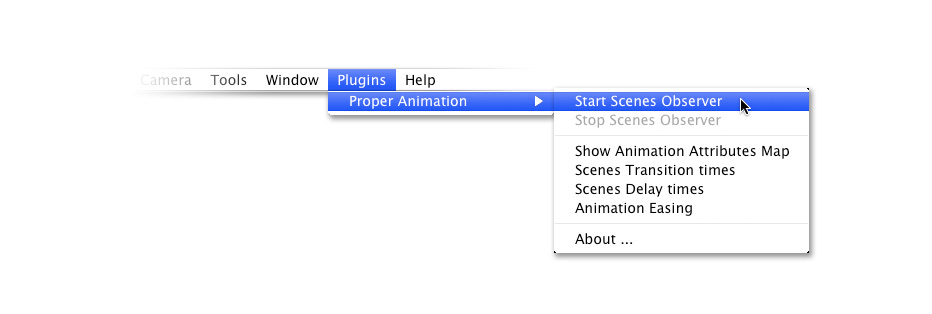
Choose Plugins > Proper Animation > Start Scenes Observer from the menu bar. This tells SketchUp to start paying attention to the Proper Animation plugin.
Step 7
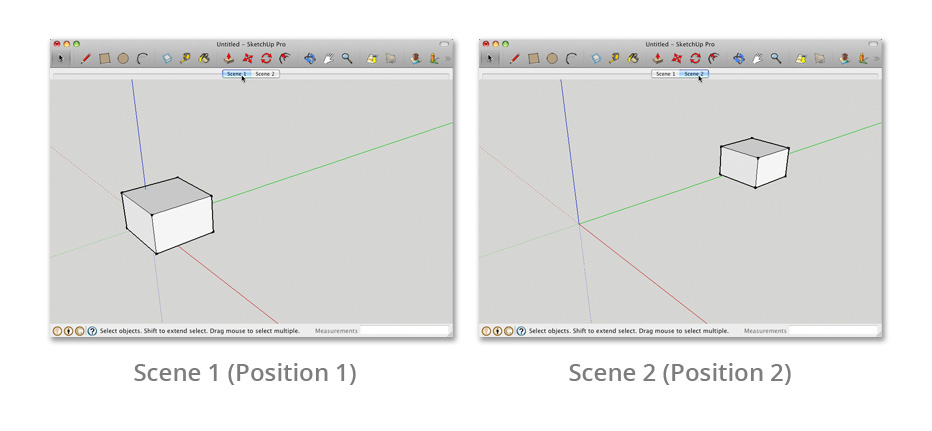
Click the first scene tab and watch the box travel back to its original position. Now click the second scene tab to animate the box back to Position 2.
Step 8
Telephone Pixar to let them know you’ll be applying for a job shortly.
Proper Animation does a whole bunch of other stuff, too. There are controls for scene transition and delay timing, as well as fancier parameters like easing. You can use the plugin’s dedicated “Animation Attributes Map” dialog box to fiddle with individual settings. Extremely advanced people are even experimenting with combining animation and rendering—take a look at the most recent pages of this SketchUcation thread to read all about it.
Note: Running Proper Animation on my Mac with the latest version of SketchUp 8 installed, I’m experiencing some weird crashing that didn’t seem to happen before. Using the plugin in connection with Scenes (as described above) seems to resolve the issue, though.
Thanks to MorisDov for a truly nifty piece of technology. A thousand nerdy assembly line robot models owe their lives to you.
 Modeling Progress: On the left are geo-models that existed before the Google workshops. On the right are models currently visible in Google Earth.
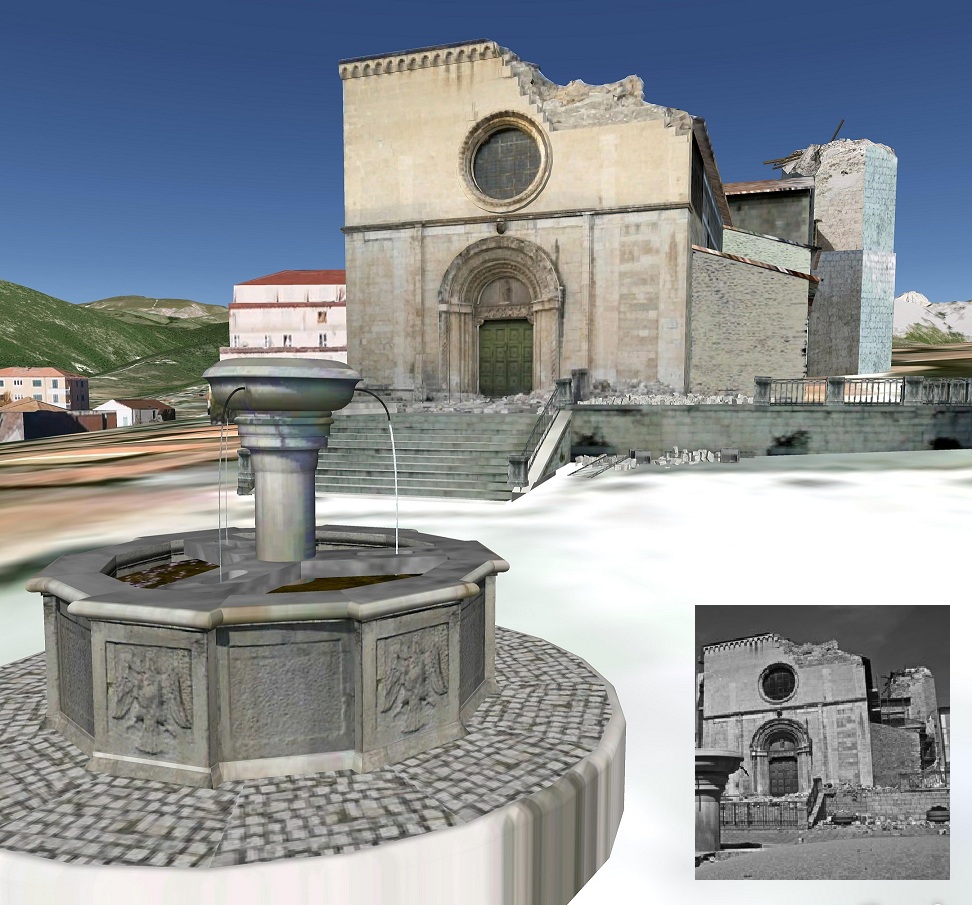 SketchUp model and picture (inset) of the S. Pietro di Coppito (XIII century) after the earthquake.
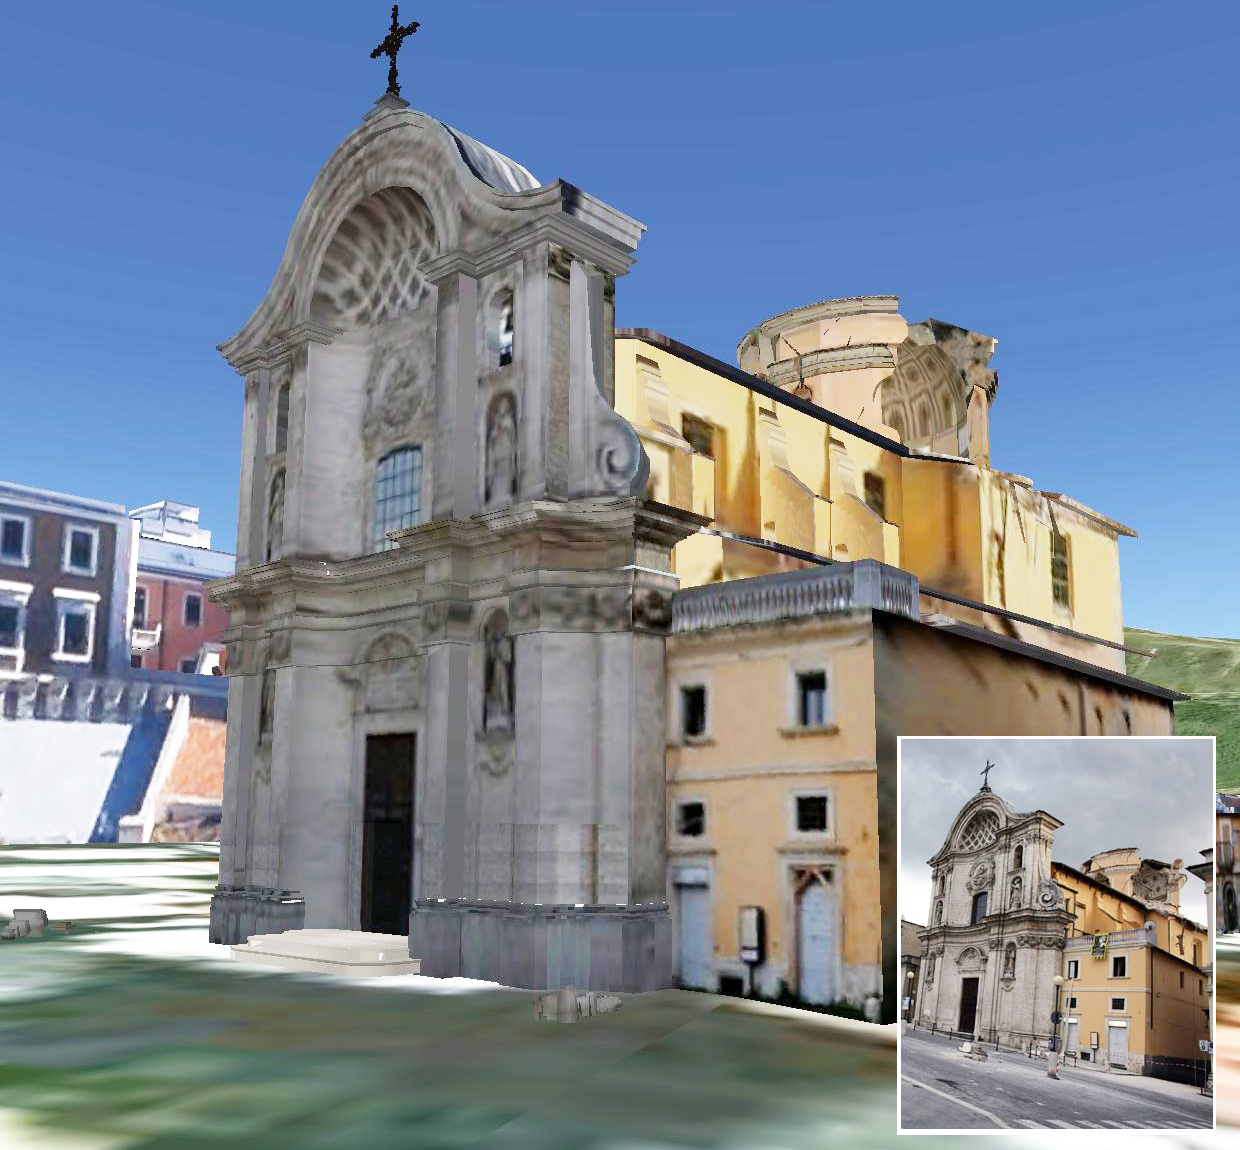 SketchUp model and picture (inset) of Santa Maria del Suffragio (XVIII century) after the earthquake.