Cutting plans and sections through your SketchUp models is the very definition of “hott”—everybody knows that. Getting those plans and sections to appear properly in your LayOut documents is a tricky proposition, though. Maybe this will help.
The Problem
Here’s the scenario: You have a building model. You want to show a plan and a section in a LayOut document derived from your model. This involves using Section Cuts to make the slices. This sounds simple enough, but there are two factors that complicate matters significantly:
- You need to create a new style specifically for the scenes that show your Section Cuts. If you don’t, it’s really complicated to make sure unsightly Section Plane objects don’t show up in your LayOut document. The image below provides a visual explanation.
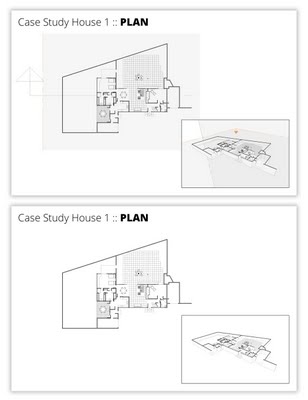 Top: If you’re not careful, your Section Plane objects will show up in your LayOut document. Bottom: Things look much better when they don’t.
- You need to use Scenes to let LayOut “see” each of your two Section Cuts (plan and section) independently. Without setting up scenes in your SketchUp model, there’s no way to assign specific a Section Cut to a viewport in LayOut. The blog post Connecting SketchUp Scenes to LayOut model viewports goes into more detail about this.
The Solution
The key to making this process work is to create a custom style specifically for sectional views of your model. Here’s how:
Step 1
Choose Window>Styles to open the Styles Manager.
Step 2
Click the Create New Style button (see below).
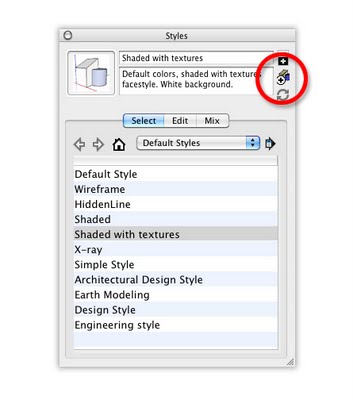 Click Create New Style in the Styles Manager.
Step 3
Give your style a meaningful name; I suggest something like “Sections”. Press Enter on your keyboard to make sure it sticks.
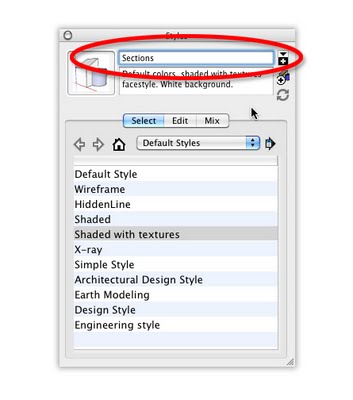 Type in a new name for your style, then hit Enter to make the change stick.
Step 4
Use the settings in the Edit tab to make your model look exactly the way you want it to.
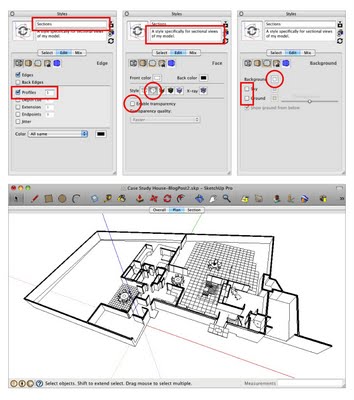
I use these style settings for sectional views of my model.
Step 5
IMPORTANT: Under “Modeling Settings”, make sure the Section Planes checkbox is deselected.
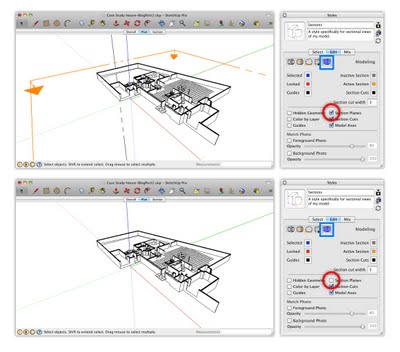 Deselecting the Section Planes checkbox in the Modeling Settings section of the Edit tab is the key to making sure your Section Planes are invisible.
Step 6
Click the Style thumbnail image to update your style with the changes you’ve made since you created it in Step 2.
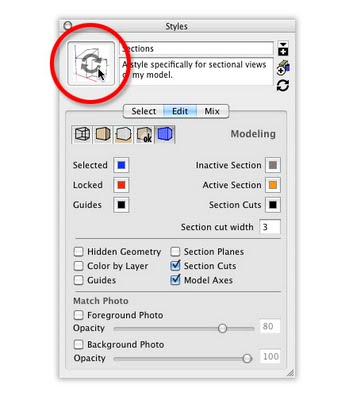 Click a style’s thumbnail image to update it. This saves the settings you’ve changed since you started editing it.
Now that you have a custom style just for sectional views, you can apply that style to all the scenes that show Section Cuts. In my case, I created a new scene for each Section Cut. They’re called “Plan” and “Section”, appropriately enough.
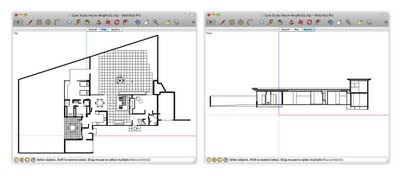 The “Plan” and “Section” scenes in my SketchUp model are set up to show different active Section Cuts. The style “Sections” is applied to both.
To make sure that the Sections style is applied to each scene, do this:
1) Activate one of the Section Cut scenes by clicking its Scene Tab.
2) Apply the Sections style by choosing it from the Select Tab in the Styles Manager.
3) Right-click the current Scene Tab and choose Update Scene.
4) Repeat Steps 1 to 3 for each of your other Section Cut scenes.
5) Save your SketchUp file.
With the right style applied to your sectional scenes, you’re ready to assign those scenes to different viewports in LayOut. Again, I covered the nuts and bolts of this process in this blog post from last year.
Another thing you should know
Every time you add a new Section Cut, all of the existing Section Plane objects in your model become visible. The custom style you created doesn’t change, though; as long as that style is applied to your scenes, and those scenes are assigned to your viewports in LayOut, everything should be fine. If (after adding a new Section Cut) you want to hide all of your Section Plane objects, all you have to do is choose View>Section Planes from the menu bar. Voilà!
Extra Bonus: This blog post from last year provides some suggestions for ways to poché (fill in) your Section Cuts.
Update: A previous edition of this blog post included some (bad) advice about waiting until you get to LayOut to assign orthographic views. On the advice of an expert, I’ve taken that bit out. Apologies for the confusion.


