GWT Goes Bidirectional!

Over 100 million web users speak languages that are written right-to-left, such as Arabic, Hebrew and Persian.

Right-to-left language support is not new to GWT. GWT makes it easy to build applications localized to both right-to-left (RTL) and left-to-right (LTR) locales, mirroring the layout of the page and its widgets so that an RTL-language page flows right-to-left. GWT even makes it easy to mirror those “handed” images that need to point in a direction that makes sense within the page. So, what’s the problem?

The Challenge of Bidi Text

An application localized to an RTL language is often used to access both RTL and LTR data, simply because data in some left-to-right languages like English is so widespread. For example, an Arabic movie review application may need to display Latin-script movie titles. Conversely, native RTL-language speakers often choose to use an English version of an application, but still use it to access and enter RTL data too. The point is that the data should be displayed in its own direction, regardless of the context’s direction. As a result, the text of the page as a whole goes in both directions; the page’s text is bidirectional, or “bidi”.

Unfortunately, inserting an opposite-direction phrase into your page without explicitly indicating where it begins and ends, often garbles it and/or the text surrounding it, putting the words and punctuation in the wrong order. For example, in an RTL context, “10 Main St.” is displayed incorrectly as “.Main St 10”. For short, we call the capability to display opposite-direction text correctly “bidi text support”.

The good news is that GWT has recently been enhanced with some powerful features for supporting bidi text. They allow your application to correctly display and enter opposite-direction text with very little extra effort.

Built-in Bidi Text Support in TextBox and TextArea

Since GWT 2.1 release, the TextBox and TextArea widgets are capable of automatically adjusting their direction as text is being entered (GWT Showcase example). This feature is enabled by default when at least one of the application’s locales is RTL, and otherwise can be enabled manually.

Built-in Bidi Text Support in Other Widgets

As of GWT 2.2 (to be released soon), several widely used widgets such as Label, HTML, Anchor, Hyperlink and ListBox gain built-in bidi text support by exposing two new interfaces:

  • The HasDirectionalText interface allows declaring the direction of text whose direction is known in advance. For example, a Label holding a phone number is always LTR, even in RTL locales, and must be declared as such to prevent garbling. You can do this by passing an extra parameter to either the constructor:
    Label label = new Label(phone, Direction.LTR);
    or to setText():
    label.setText(phone, Direction.LTR);
  • The HasDirectionEstimator interface allows widgets to cope with text whose direction is unknown (for example text previously entered by users). When direction estimation is enabled, the widget estimates the direction of the text content at runtime, and sets its display direction accordingly. Note that usually there’s no need to use this feature for boilerplate text (i.e. messages), since such text usually matches the overall page direction.

In the following example, an imaginary application collects reviews of books from the users. A user can add to the repository a new book with its name and review. To view the review of a specific book, one can select its name from a ListBox holding the books’ names. Note that books’ names may be of both directions, especially in RTL locales.

public class BookReviewApp() {
  private ListBox bookNamesListBox;
  …
  public BookReviewApp() {
    // Enable bidi support.
    bookNamesListBox.setDirectionEstimator(true);
    …
  }
  public addBook(String bookName, String review) {
    // ListBox item’s direction will be set automatically.
    bookNamesListBox.add(bookName);
    …
  }
  …
}

Bidi and Messages

BidiFormatter is a new class providing bidi text support primitives like estimating a string’s direction and wrapping it in HTML for correct display in a potentially opposite-direction context. The new built-in bidi text support features in the widgets mentioned above use BidiFormatter to do their stuff. Sometimes, however, you may need to use BidiFormatter directly. It is particularly useful with message placeholder values. While the message as a whole is usually localized to the user interface language, placeholder values may be in an arbitrary language and thus may have the opposite direction. Use BidiFormatter’s methods to wrap such values before inserting them into the message. A comprehensive example of using BidiFormatter with messages is available in the GWT Showcase.
SketchUp 7.1 for Architectural Visualization: Retweet and Win a Free Copy

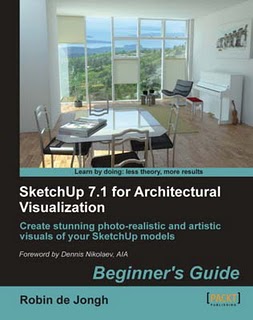
As regular readers will know we are big fans of Google SketchUp here at digital urban. From its ability to export to game engines such as Unity through to its integration with Google Building Maker, SketchUp has become our one stop shop for urban modelling. To get the most out of SketchUp it is well worth sitting back and going through one of the many tutorial books and ‘SketchUp 7.1 for Architectural Visualization’ by Roben de Jongh is one of the best out there.

Normally we are slightly skeptical about tutorial books, after all most tutorials can now be found online but Robin provides a unique step by step guide that provides an essential skill set. For example, Chapter 4 details how to model ridge tiles, that is not something your easily come across online and that alone makes the book a must buy.


Here is a brief summary of what each chapter covers:


Chapter 1: Quickstart Tutorial – Photo Real Gallery Scene – This chapter is an immediate fix for those who are impatient to get photo-realistic rendered SketchUp scenes. Straight away you will learn how to model the gallery scene, fix up lighting, add materials, add a photo background, and finally render in Kerkythea.


Chapter 2: Plug in and Gear Up – Did you know that by downloading a few free plugins and other software you can turn SketchUp into a free fully functional 3D visualization and animation suite similar to high end commercial software? Follow this chapter to obtain all the goodies.

Chapter 3: Composing the Scene – In this chapter you will learn how to take the hard work out of modeling by setting up your scenes prior to starting work. You will learn how to start from CAD plans, site images, or Google Earth and build the scene optimized for quick rendering or animation later.

Chapter 4: Modeling for Visualization – SketchUp is so easy to use that we’re tempted to jump right in and model everything. But this can lead to ineffective presentation later and large polygon counts, which slow the computer. This chapter leads through some of the professional modeling methods you need to learn to save you time and hassle, and to make photo-real rendering a cinch.

Chapter 5: Doing It Up (How to Apply Materials and Photo-textures) – Most visualizers are crazy enough to use the materials bundled with rendering software. But this methodology was developed during the ice age! Now that we all have digital cameras and access to unlimited free online image resources, we have a far more effective way of “dressing” the model. The tutorials in this chapter show you how to use SketchUp’s unique photo and material handling tools to create ultra-real textured models mega easily.

Chapter 6: People, Trees, Furniture, and Things – Now that you’ve created the scene, modeled the buildings, and applied materials, you can add life to the scene with Entourage. Learn how to find the best free people, foliage, vehicles, and furniture online, and better still learn how to easily create your own with the foolproof methods in this chapter. In no time you’ll be able to build up a comprehensive library to use or give/sell to others.

Chapter 7: Artistic Techniques – Exporting images from SketchUp is not the end of the process. Combining several image layers in GIMP, a powerful free photo editing suite, you will learn how to simulate sketchy pencil and watercolor styles. Fans of these methods will be pleased to know the famous Dennis Technique is presented in this chapter along with Dennis’s own creations.

Chapter 8: Photo-realistic Rendering – Here the amazing Kerkythea introduced in Chapter 1 and 2 is explored in more depth, giving you the skills and confidence to tackle any rendering project. A hassle-free method of working is introduced along with proven best settings for test renders and final outdoor and indoor scenes. This chapter covers everything you need to get professional photo-realistic renders from your SketchUp model that you’ll be personally amazed with.

Chapter 9: Image Compositing and After-effects – The rendering process isn’t the end of the line, because there are lots of subtle but important after-effects you can apply to make the image even more effective. This chapter covers how to add reflections without rendering, creating depth of field effects from a depth render, adjusting levels for realistic daylight scenes, and compositing real and rendered images.

Chapter 10: Animated Flyovers and Walkthroughs – The crowning glory of your visualization project is likely to be a rendered or artistic-style animation. The tutorials in this chapter will take you through this step by step, showing you how to create storyboards, set up cameras and paths in SketchUp with extra plugin functionality, export test animations and final renders. Photo-real animations are then composited to make a simple show reel.

Chapter 11: Combining It All in Layout – Layout is bundled as part of SketchUp Pro and is introduced in this final chapter for those who wish to explore the free trial before committing to Pro. You will learn how to bring together SketchUp models and artistic or rendered output into a screen presentation or printed portfolio, adding borders, text and dimensions.

The good news is that the nice people at Packt Publishing have provided us with 3 copies to give away. All you need to do is retweet this post and we will pick 3 random twitter users by 12 Noon Monday 10th January, each will receive a copy of the book. The competition is open to anyone in the world, yep we will ship it out free of charge next week.

You can buy the book direct from Packt or of course online via Amazon

Where has Google shipped their Chrome notebooks?

Earlier this month, Google started giving away thousands of their “CR-48” test notebooks loaded with an early version of Chrome OS, their lightweight operating system that will officially debut next summer.

The netbook can’t yet handle the Google Earth plugin, so we’ll have to look at that in the future if/when it becomes available. However, when free laptops are being sent out it tends to gain a lot of attention, and thousands of people have been keeping a close eye on this unofficial CR-48 tracker created by “A. Gamer” to see when some might be coming to their zip code. I’ve personally been referencing the tracker quite a bit to check on potential shipments for friends and family.

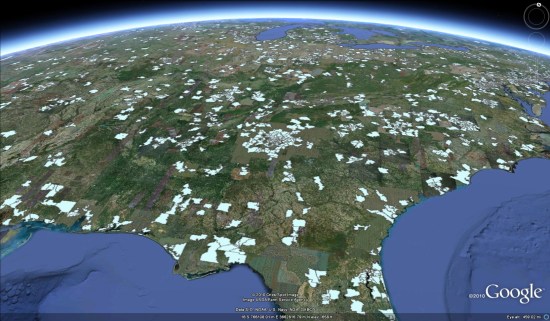
A Google Earth user named Jesse Belcher then worked with the folks behind the CR-48 tracker to visualize all of the laptop shipments in Google Earth and the result is pretty cool:

chrome-counts.jpg

You can view that data on his website using the Google Earth Plug-in, or download one of his KMZ files to view it in Google Earth.

The notebook has a few major shortcomings (the lack of the Google Earth Plugin being one of them), but it’s really a fairly impressive device. I wrote up some early thoughts about it on my personal blog a few weeks ago if you want to see more about what I think of it.

They’re still accepting applications and giving away more of the laptops, so sign up here to apply for one if you haven’t already.

For those of you that were lucky enough to receive one already, what do you think of it? Do you think Chrome OS will be a viable alternative in the future?