SketchUp: How to Scaling imported raster images in LayOut

If you’ve ever inserted an aerial photo or an old scanned site plan into LayOut, you might have wanted to give it a specific scale on the page. My favorite technique for doing this uses the Clipping Mask feature.

Step 1
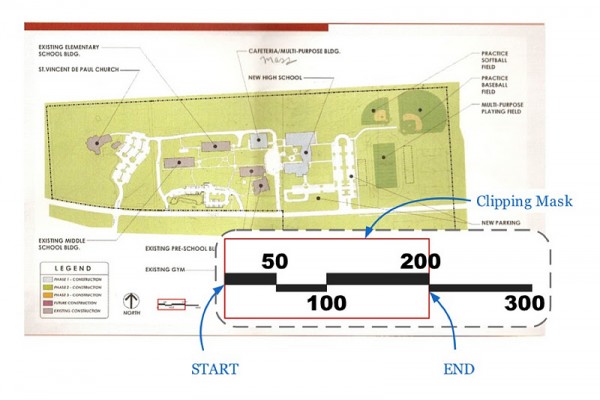
Choose File > Insert… to insert a raster image into your LayOut document. Find a known measurement somewhere on your image. This known measurement can be anything: a scale bar (if you’re lucky); the length of a fence or sidewalk; or even the roofline of a building. It’s important that you find something that’s relatively large and that whose length you already know. You’ll use this portion of the image as a “benchmark” to size the entire image to a specific scale.

In my example, a scale bar was included in my image; this makes it pretty easy to use as a benchmark.


Step 2
Figure out what scale you’d like to give your inserted image. Keep in mind how the scale will impact the size of the image and how that image will fit on your page.

For this image, I’m going to use 1” = 400’ (1:48) scale. This should fit nicely on an 8.5 x 11 sheet of paper.


Step 3
Create a rectangle around the “benchmark” portion of your image. Use the Rectangle tool to do this, and make sure it has no fill (so that you can see through it.)

This scale bar only goes to 300’, so I’m going to use the 0’ – 200’ as my benchmark. 200 is half of 400, which makes the mental math easier to do.


Step 4
Select both your rectangle and your image and choose Edit > Create Clipping Mask. Select the resulting crop and give it a visible stroke so you can see its boundary.

I color the clipping mask to make its border easier to see.


Step 5
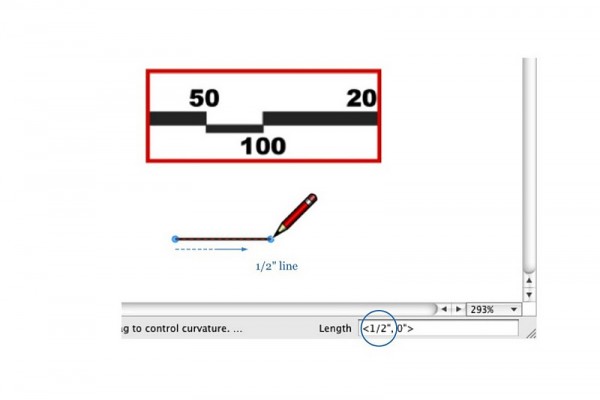
Somewhere on your page, use the Line tool to draw a line whose length corresponds to the scale of the image you’re working on.

To draw a line, click to start drawing, move your cursor in the direction you want the line to go, type the length you want and hit Enter.

Since I want a scale of 1” = 400’, and my “benchmark” is 200’ feet long, I draw a horizontal line which is one-half inch long (1 inch divided by 2).


Step 6
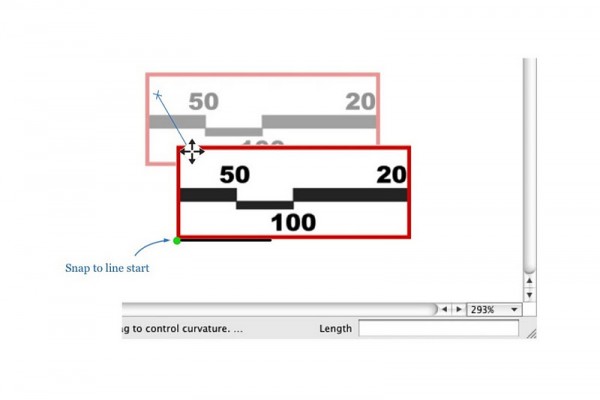
Move your benchmark, snapping its lower-left corner to the left endpoint of your line. Be sure that Object Snap (Arrange > Object Snap) is turned on, or snapping won’t work properly.

I snap my benchmark to the left endpoint of my line.


Step 7
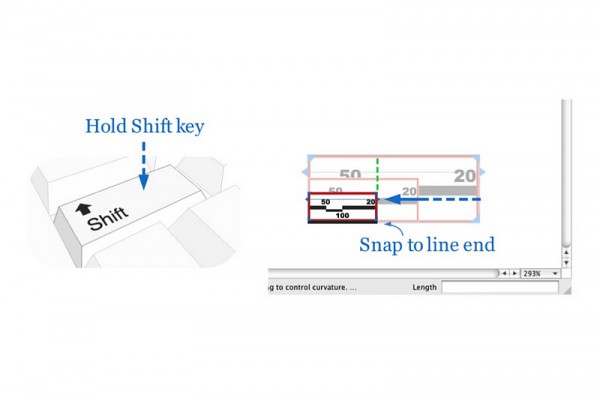
Scale your benchmark so that it’s the same length as the line. With your benchmark selected, hold down the Shift key and scale it until it snaps to the right endpoint of your line. As long as you hold down Shift, your selection should scale proportionately.

I scale my benchmark to the right until it aligns and snaps to the end of my line.


Step 8
Select the benchmark and choose Edit > Release Clipping Mask. Delete the rectangle from Step 3, and the line you drew in Step 5, and you’re done. Voilà! You’ve set your image to a specific scale.

Image set at 1” = 400’ (1:48) scale and positioned on a letter-sized landscape sheet.


This may seem like a lot of steps but it’s actually pretty simple. Have a look at the following silent movie to see how it’s done.

sketchupdate.blogspot.com
SketchUp: The textures

If you’re into such noble pursuits as geo-modeling or photo-realistic rendering, there’s a good chance that you spend a ridiculous amount of time hunting for photo-textures online. Flickr and other photo sharing sites are goldmines for content, but who has time to compile a folder of bookmarks that point to the best ones?

Our friend John Pacyga, apparently. He’s just posted a long list of his favorite texture sources — for both SketchUp and Photoshop. Some are free, some have Creative Commons licenses, and some cost money, but all are worth browsing. Set aside some time, though; this kind of thing is addictive.

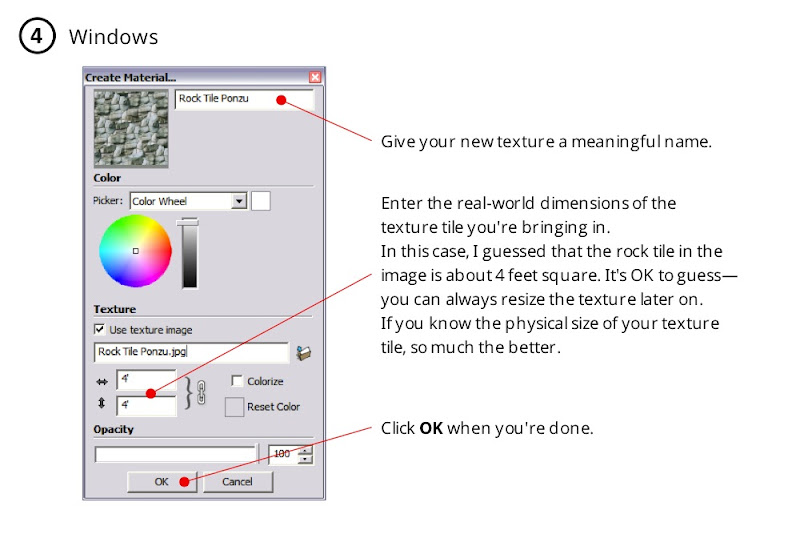
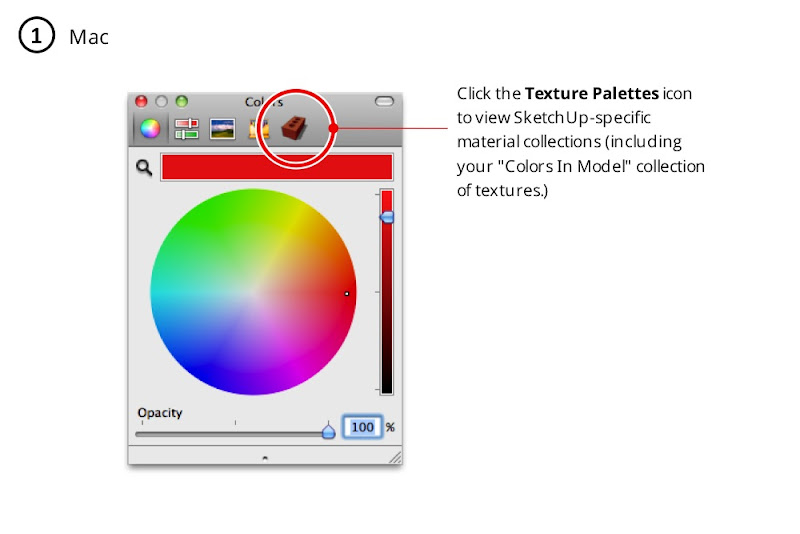
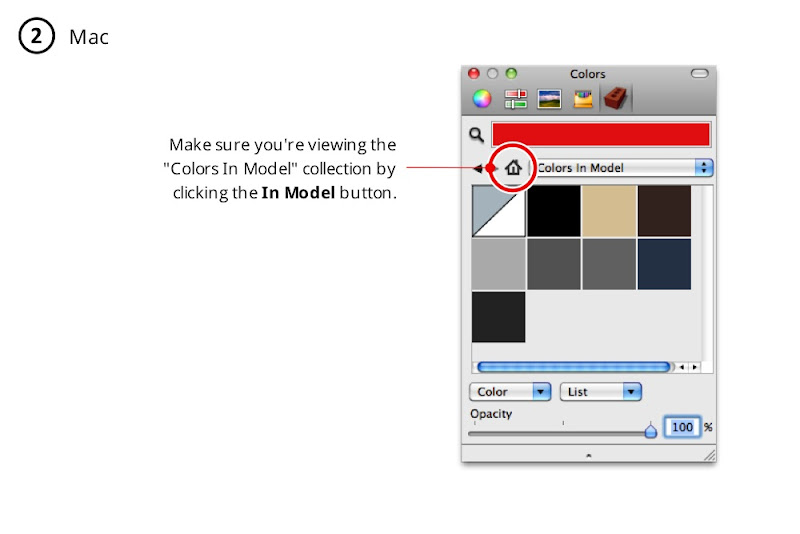
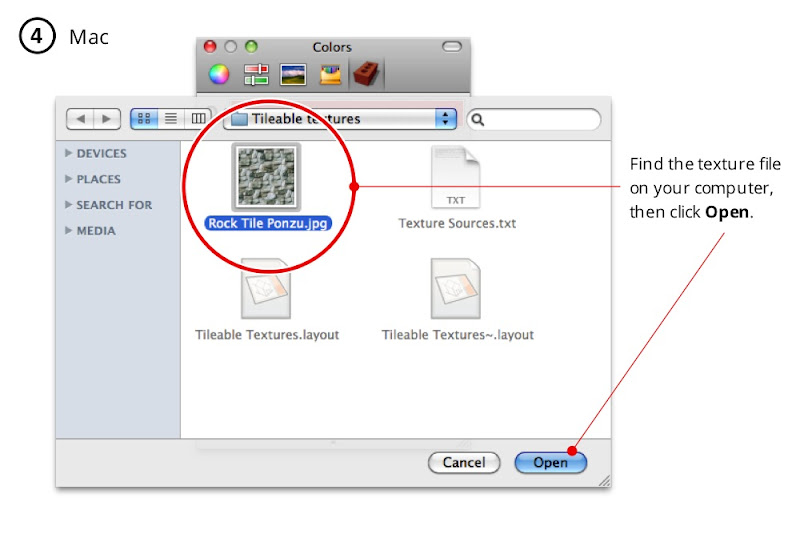
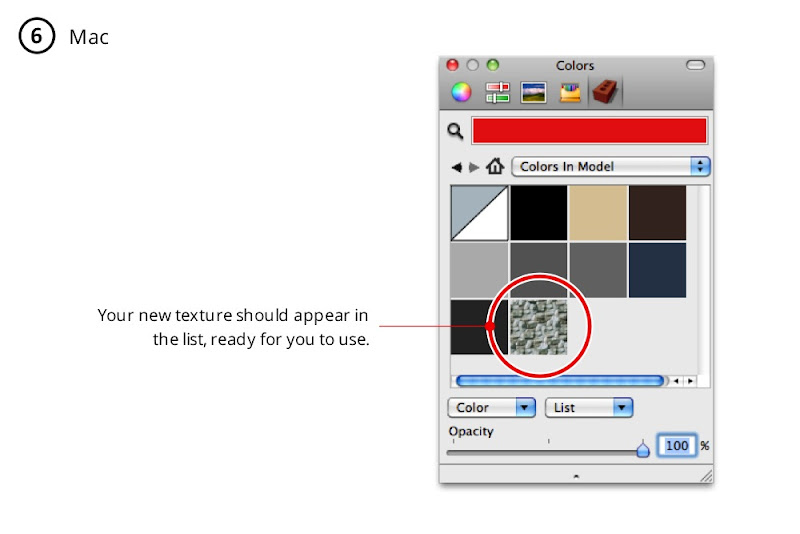
If you’ve found a seamless texture (one that can repeat attractively when you paint it on a surface), here’s how you load it into SketchUp:

Instructions for Windows:

Instructions for Mac:


I found the rock texture in the screenshots above on lee.ponzu’s Flickr Textures set. Want to make your own seamless texture images? These tutorials on YouTube are a good place to start.

SketchUp: How to assign materials to groups and components

Everybody knows that faces in SketchUp can be painted with different materials. What lots of folks don’t know is that you can apply materials to groups and components, too. The following illustration shows the Entity Info dialog box, which is a great place to see which materials are applied to your geometry.

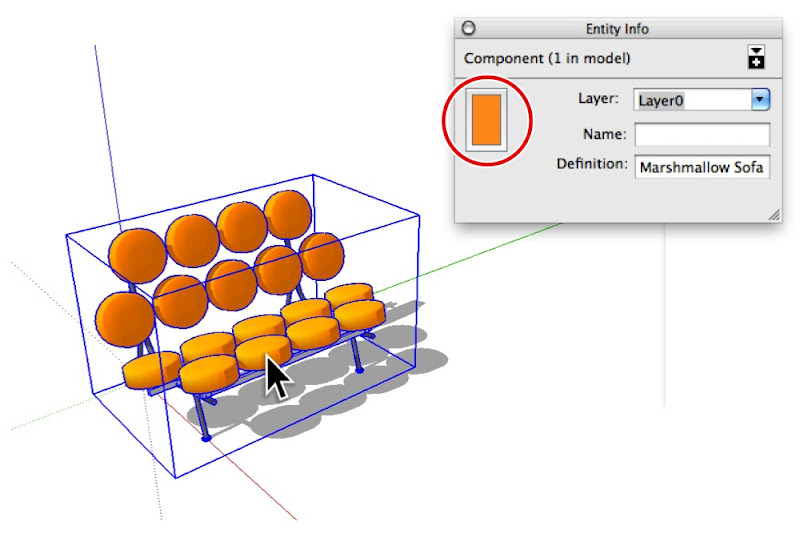
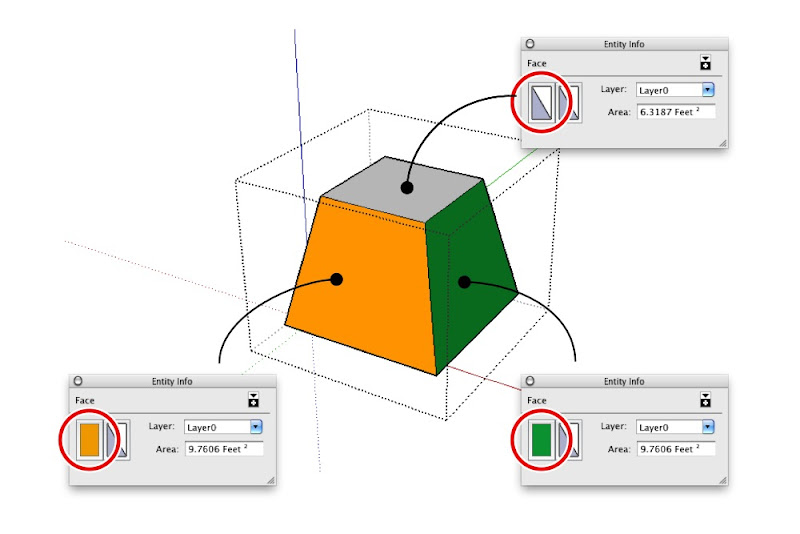
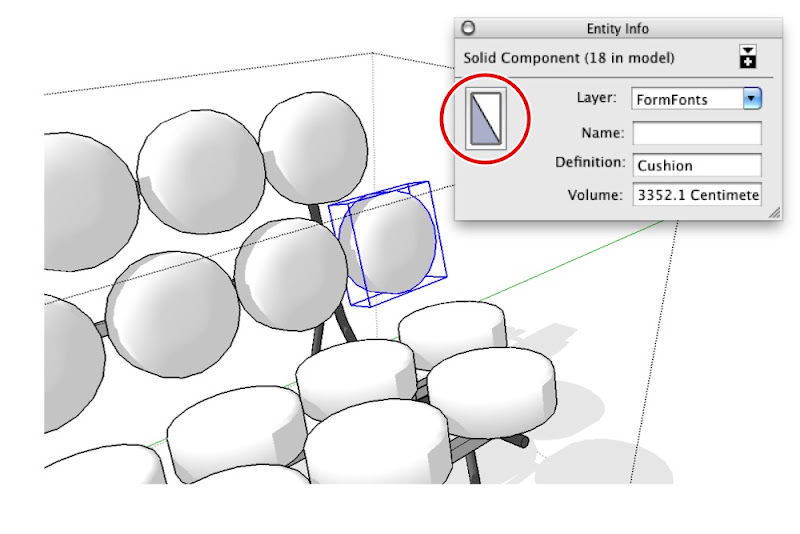
The Entity Info dialog box (Window > Entity Info) shows thumbnails for the materials assigned to selected entities. When you select a face, it shows thumbnails for the front and back sides of that face (top). Groups and components have material thumbnails, too (bottom).


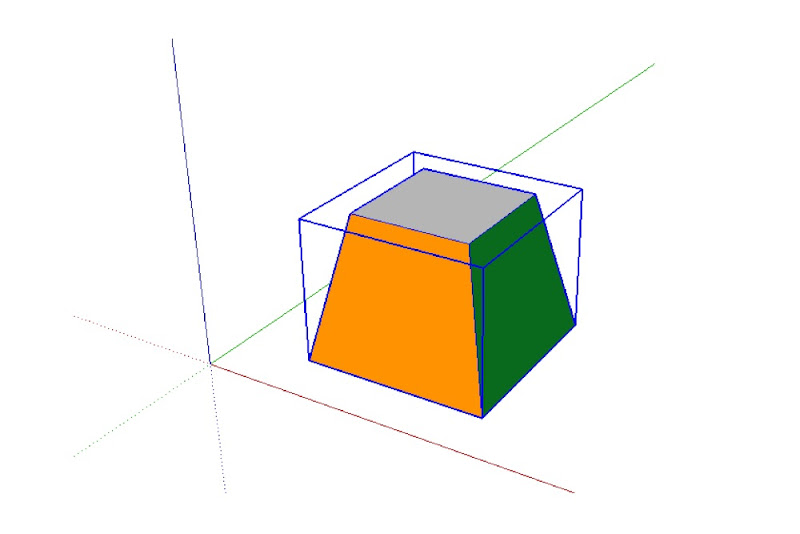
When you paint a group or component red, only the faces inside it that are painted with the Default* material turn red. Faces that have already been painted with another material don’t change at all.

The above group (top) includes faces that are painted with different materials (bottom). Only the top face is assigned the Default material.


Applying a material to the entire group only changes the color of faces that are painted the Default material.


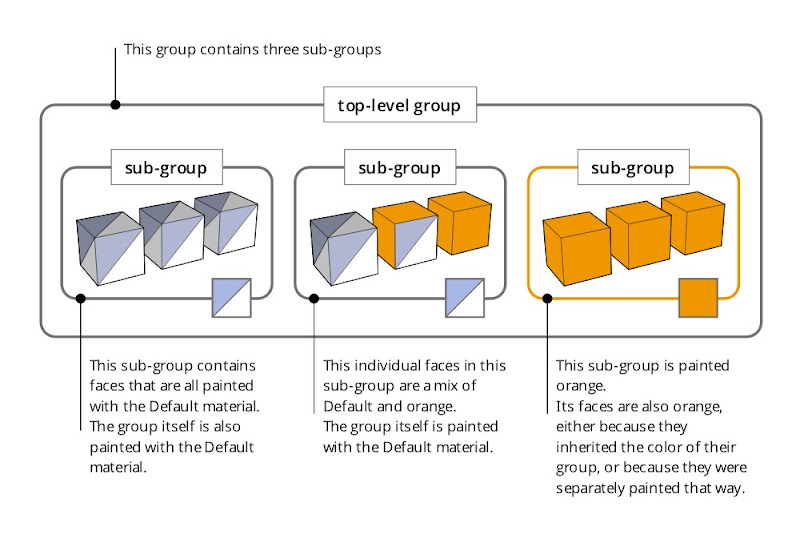
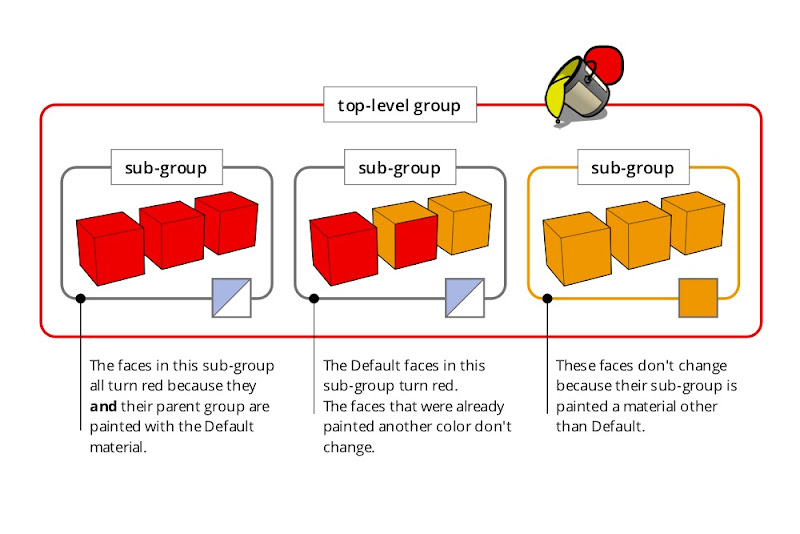
This trick also works with groups and components that are nested inside one another. When you apply a material to a top level group or component, all the Default-colored faces that are inside nested, Default-colored groups and components inherit that material automatically. The following diagram is my best attempt at a visual explanation of this phenomenon.

Applying a material to a group or component that in turn contains sub-groups and component instances can be a confusing experience. Just remember that the color you’re painting “trickles down” to Default-colored faces contained within Default-colored groups and components. It’s easier done than said : )


*SketchUp automatically applies the Default material to faces you create from scratch. You can also paint anything with the Default material at any time; just pick it in the Materials Browser (which looks completely different on PCs and Macs.)

The Windows and Mac versions of the Materials Browser. On the former, the Default material is included as a permanent thumbnail; on the latter, it’s the first material in the “Colors In Model” list.


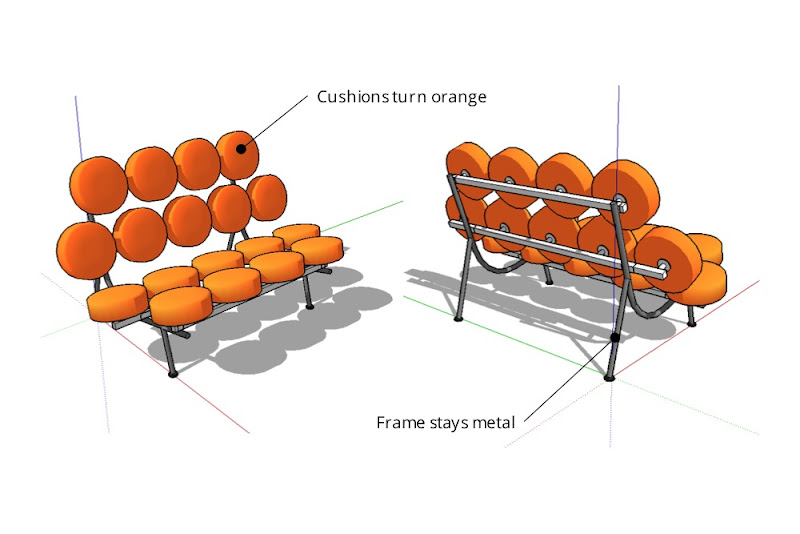
As you can see, this technique is a godsend for building complicated objects that need to change color easily. In the case of the George Nelson Marshmallow Sofa in the images that follow, the cushions are individual component instances nested inside the main Sofa component. These are assigned the Default material.

I downloaded this George Nelson Marshmallow Sofa component from FormFonts.

The individual cushions are instances of the same component. Each instance is assigned the Default material.

The faces that make up the surface of each cushion are also painted with the Default material.


All of the metal and rubber frame pieces are also groups and components, but their faces are all assigned specific materials.

The faces in the non-cushion parts of the sofa are all assigned materials other than Default.


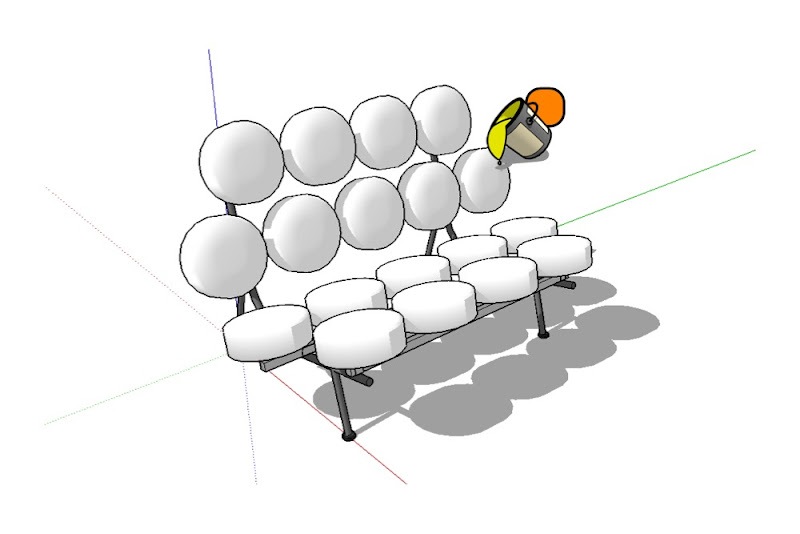
When you use the Paint Bucket to paint a color—in this case orange—on the main Marshmallow Sofa component, only the cushions take on that color. Everything not assigned the Default material stays exactly the way it is.

Painting the sofa component orange causes all Default-painted faces to turn that color. Non-Default-colored faces remain unchanged.