You might not realize that the display settings you choose to apply to your models can affect SketchUp’s speed and general responsiveness. Turning on fancy edge effects and other doodads will slow you down when your model gets big.
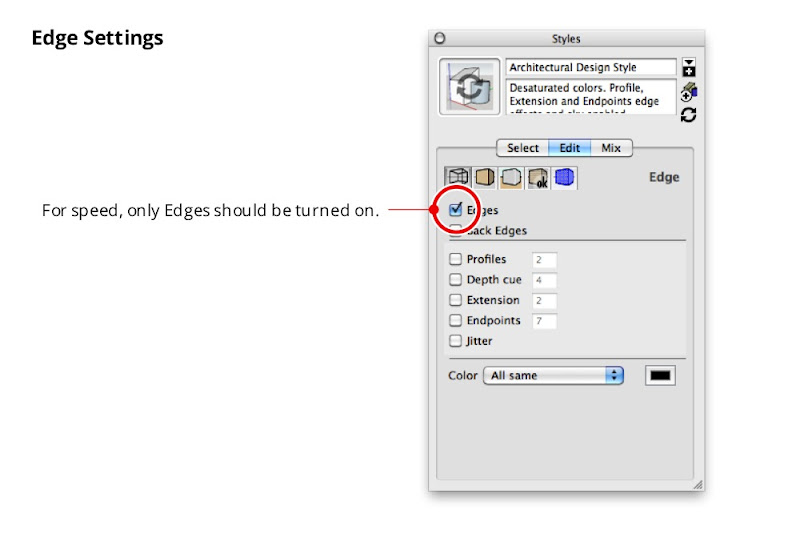
When you’re working on a big model, you want to make sure that you’re using a style whose Edge Settings panel looks like the one in the image below. Everything but “Edges” should be turned off.
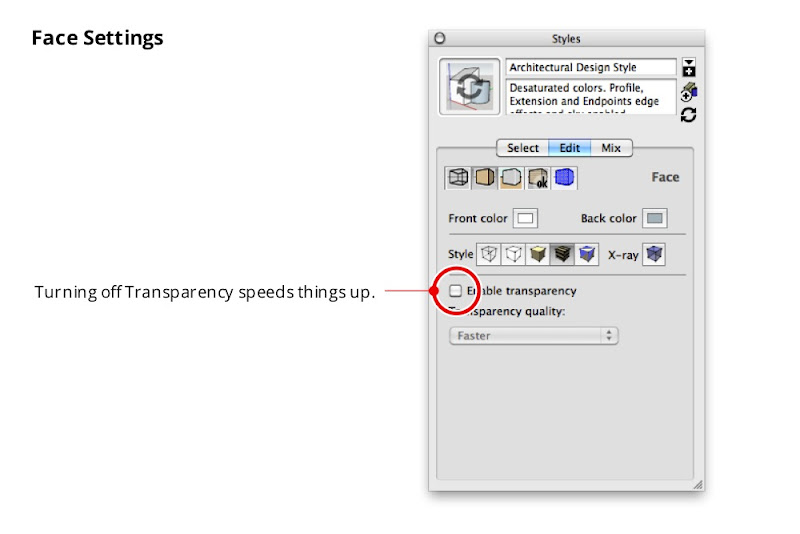
The Face Settings panel is where you can choose not to display Transparency. When Transparency is turned on, SketchUp has to redraw your model on the screen several times—each time you change your viewpoint. If you don’t need to see through your windows just now, opt to temporarily view these faces without transparency.
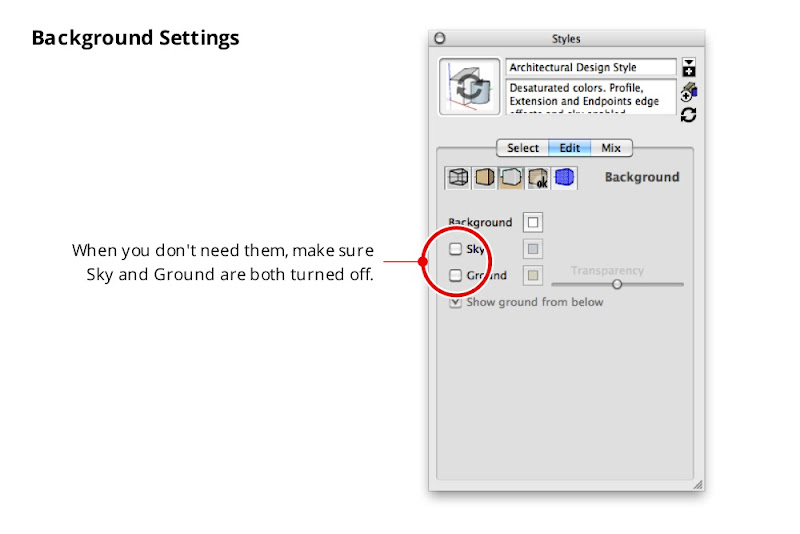
The Background Settings panel is handy for turning off Sky and Ground, both of which cause your computer to do extra thinking while you’re working.
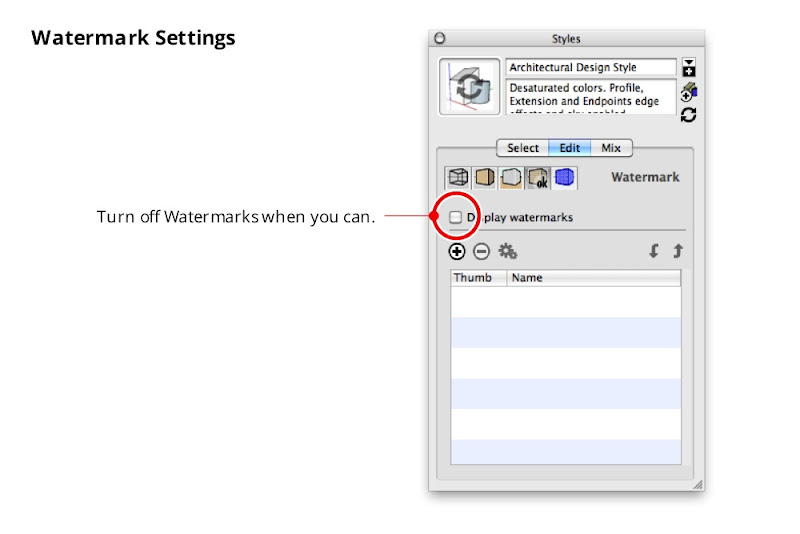
Unless you absolutely need them, you should use the checkbox in the Watermark Settings panel to turn off Watermarks.
The only toggles in the Modeling Settings panel you really need to worry about are the ones for Hidden Geometry and Section Planes. Obviously, you shouldn’t have wither of these displayed if speed is what you’re aiming for.

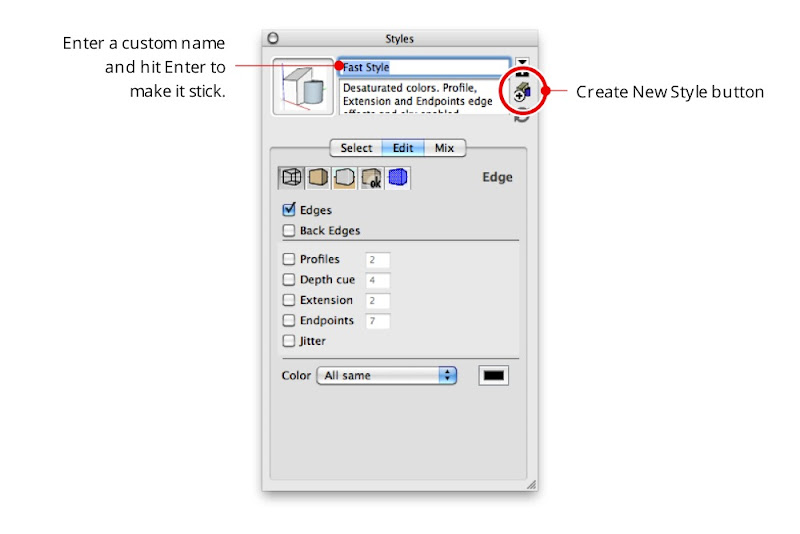
Once you’ve configured your own fast style, you should save it. Just give it a new name (I suggest “Fast Style”), hit Enter, and click the Create New Style button in the Styles Browser. You new style is saved in the “In Model” collection of styles, which is only associated with the model you’re currently working on.
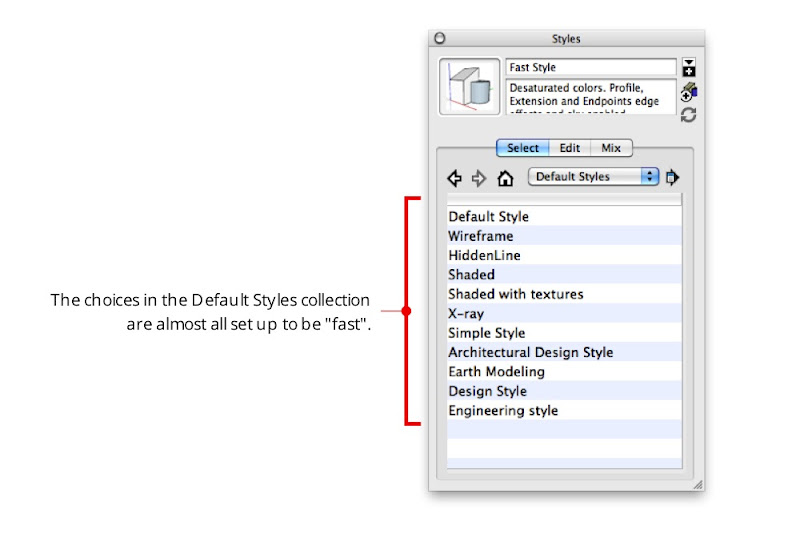
Incidentally, almost all of the choices in SketchUp’s Default Styles collection are so-called “Fast styles” — their Edge Display settings are already configured for speed. Choosing any one of these styles will switch off extraneous effects.
Make a Fast Scene
True SketchUp whizzes invariably go one step further and add a special “Fast” scene that they can activate whenever they need to. Rather than having to mess with the Styles Browser every time they want to activate their Fast Style, they just click a scene tab at the top of the modeling window. This Fast scene is usually set up to do three things: Switch to a Fast style, turn off Shadows, and turn off Fog.
Follow these steps to add a Fast scene to your model:
- Apply a Fast style to your model by choosing it from the Style Browser’s Select tab.
- Make sure Shadows and Fog are both turned off. These toggles are in the View menu.
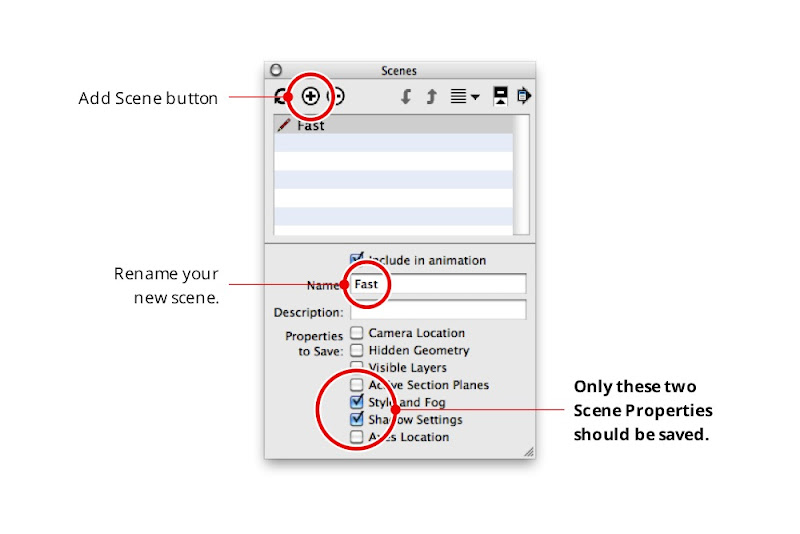
- Choose Window > Scenes to open the Scenes Manager.
- Expand the Scenes Manager by clicking the Show Details button in the upper right corner.
- Click the Add Scene button to add a new scene to your model.
- Rename your new scene “Fast” (or something similarly descriptive) and hit Enter on your keyboard.
- Make sure that only the “Style and Fog” and “Shadow Settings” checkboxes are selected in the Properties to Save section of the Scenes Manager.