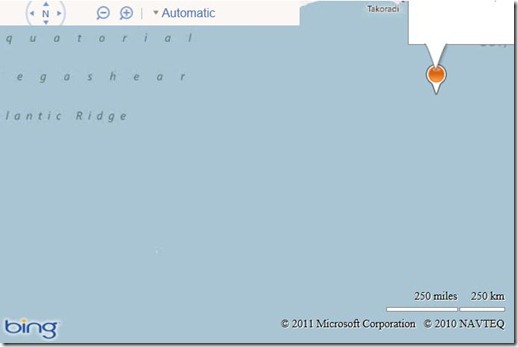
In the Bing Maps v7 AJAX control, when you open an infobox it will open up where it is positioned. If you are near the edges of the map it will go beyond the edges and end up getting cut of, out of view as the infobox is within the map div which hides any overflowing elements. Here is an example.

This might not be the ideal default case, but Bing Maps is developed in such a way that it tries to give you the basic use case and all the tools needed to create the experience you want. One way around this is to use the Custom Infobox Control module for Bing Maps that will change the direction of the infobox so that it appears towards the center of the map. This works well in some cases, but completely ignores the built in infobox control and requires jQuery.
For those migrating from Multimap you may prefer the map to reposition so that the infobox comes into view. This is a user experience that others would prefer as the infobox will always render in the same way. The following code uses the built in infobox properties to determine if the infobox needs to be repositioned and if it does it moves the map so that the infobox comes into view.
[php]
<!DOCTYPE html PUBLIC "-//W3C//DTD XHTML 1.0 Transitional//EN" "http://www.w3.org/TR/xhtml1/DTD/xhtml1-transitional.dtd">
<html>
<head>
<title></title>
<meta http-equiv="Content-Type" content="text/html; charset=utf-8">
<script type="text/javascript" src="http://ecn.dev.virtualearth.net/mapcontrol/mapcontrol.ashx?v=7.0"></script>
<script type="text/javascript">
var map = null;
var pinLayer, pinInfobox;
function GetMap() {
// Initialize the map
map = new Microsoft.Maps.Map(document.getElementById("myMap"), { credentials: "YOUR_BING_MAPS_KEY", zoom: 5 });
//Create two layers, one for pushpins, the other for the infobox. This way the infobox will always be above the pushpins.
pinLayer = new Microsoft.Maps.EntityCollection();
map.entities.push(pinLayer);
var infoboxLayer = new Microsoft.Maps.EntityCollection();
map.entities.push(infoboxLayer);
// Create the info box for the pushpin
pinInfobox = new Microsoft.Maps.Infobox(new Microsoft.Maps.Location(0, 0), { visible: false });
infoboxLayer.push(pinInfobox);
//Create a test pushpiin
var pin = new Microsoft.Maps.Pushpin(map.getCenter());
pin.Title = ‘This is pin 1’;
pin.Description = ‘Pan map so pin is at edge and then click on pin.’;
Microsoft.Maps.Events.addHandler(pin, ‘click’, displayInfobox);
pinLayer.push(pin);
}
function displayInfobox(e) {
if (e.targetType == "pushpin") {
pinInfobox.setOptions({ title: e.target.Title, description: e.target.Description, visible: true, offset: new Microsoft.Maps.Point(0, 25) });
pinInfobox.setLocation(e.target.getLocation());
//A buffer limit to use to specify the infobox must be away from the edges of the map.
var buffer = 25;
var infoboxOffset = pinInfobox.getOffset();
var infoboxAnchor = pinInfobox.getAnchor();
var infoboxLocation = map.tryLocationToPixel(e.target.getLocation(), Microsoft.Maps.PixelReference.control);
var dx = infoboxLocation.x + infoboxOffset.x – infoboxAnchor.x;
var dy = infoboxLocation.y – 25 – infoboxAnchor.y;
if (dy < buffer) { //Infobox overlaps with top of map.
//Offset in opposite direction.
dy *= -1;
//add buffer from the top edge of the map.
dy += buffer;
} else {
//If dy is greater than zero than it does not overlap.
dy = 0;
}
if (dx < buffer) { //Check to see if overlapping with left side of map.
//Offset in opposite direction.
dx *= -1;
//add a buffer from the left edge of the map.
dx += buffer;
} else { //Check to see if overlapping with right side of map.
dx = map.getWidth() – infoboxLocation.x + infoboxAnchor.x – pinInfobox.getWidth();
//If dx is greater than zero then it does not overlap.
if (dx > buffer) {
dx = 0;
} else {
//add a buffer from the right edge of the map.
dx -= buffer;
}
}
//Adjust the map so infobox is in view
if (dx != 0 || dy != 0) {
map.setView({ centerOffset: new Microsoft.Maps.Point(dx, dy), center: map.getCenter() });
}
}
}
</script>
</head>
<body onload="GetMap();">
<div id=’myMap’ style="position:relative; width:600px; height:400px;"></div>
</html>
[/php]
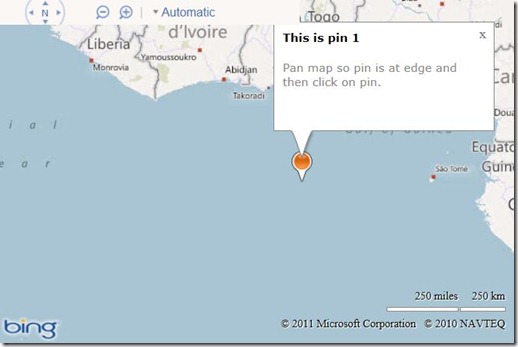
When you load this code into a browser a pushpin will appear in the center of the map. Pan the map so that the infobox is near one of the edges. When you click on the pushpin to open the infobox you will see the map reposition such that the infobox comes into view. The example below is the result of opening the infobox when the pushpin was in the top right corner of the map.

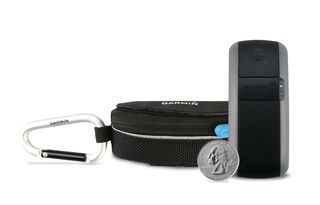
 with a Forerunner so that, at a glance, I would know exactly how I was doing throughout the race. Tomorrow will be my first with a GTU tracking unit so that, at a glance, my friends and family will know exactly how I’m doing throughout the race. And while I haven’t trained as much as I’d planned heading into New York next month, it’s not that I’m wearing GTU out of fear that something bad will happen (though that’s a logical use as well). Rather, I want people who can’t attend the marathon to be able to enjoy the experience along with me simply by glancing down at their smartphone or laptop. So I’m drawing geofences – virtual boundaries – around key milestones and mile markers so that as I pass through, text and email alerts will be sent to my friends who requested them. For real-time updates, they can log into my my.Garmin account and check the location at any time. It’s not quite the same as hearing them cheer me on along the streets, but I know they’ll be supporting me from afar – even if it is just a glorified training run as a final preparation for New York.

