The most sure-fire way to mitigate your model’s geometric complexity (its count of faces and edges) is to pay attention to extruded circles and arcs. Experienced modelers know that curves in SketchUp are actually constructed out of multiple, straight edges. By default, circles have 24 sides and arcs have 12 sides. Zoom in and you’ll see what I mean:
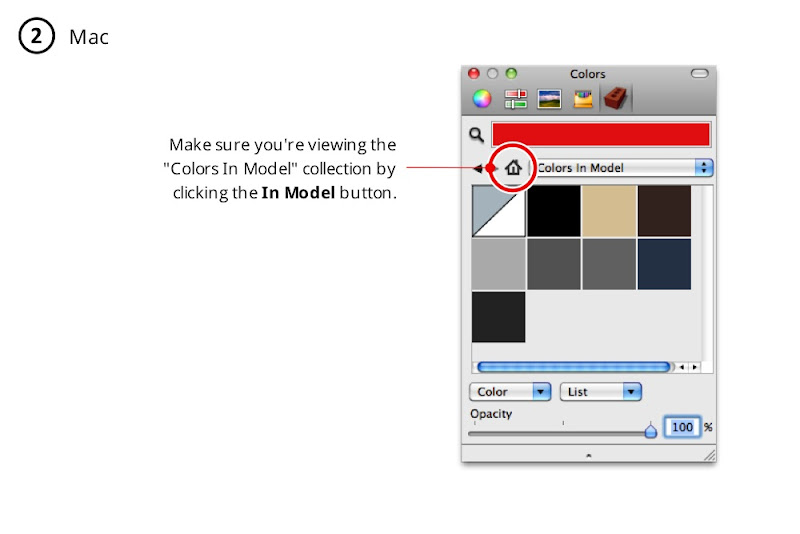
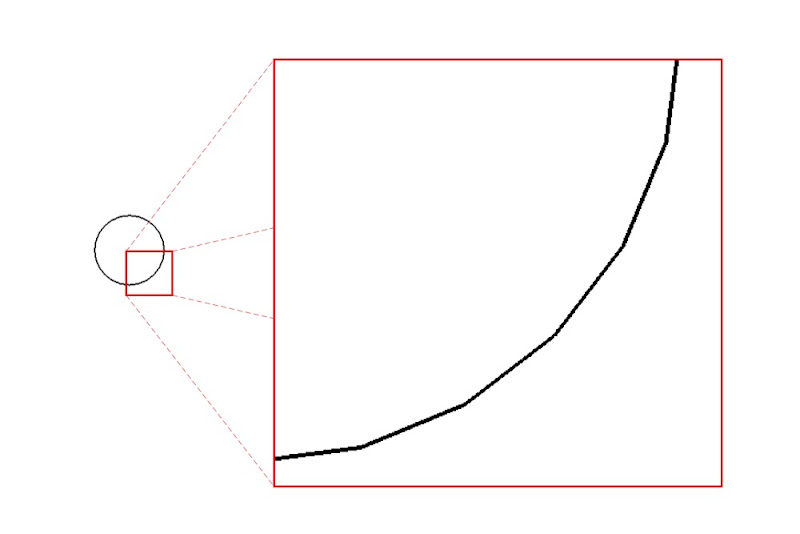 By default, circles you draw in SketchUp have 24 sides.
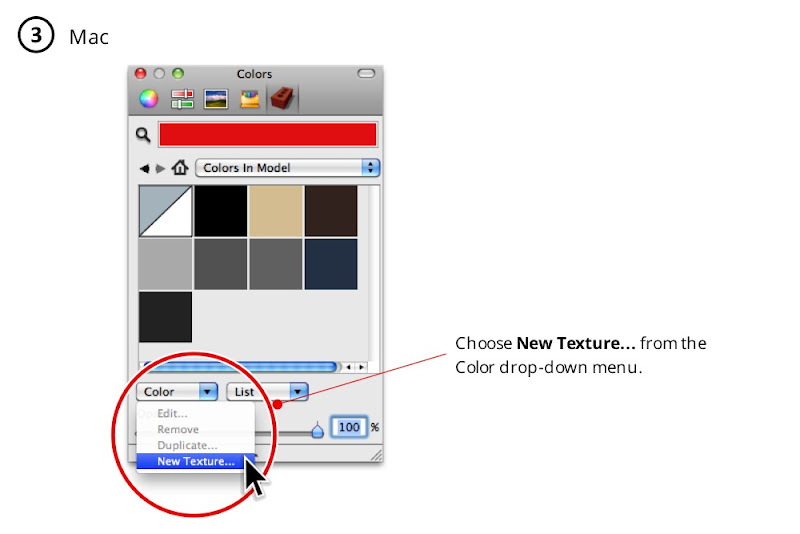
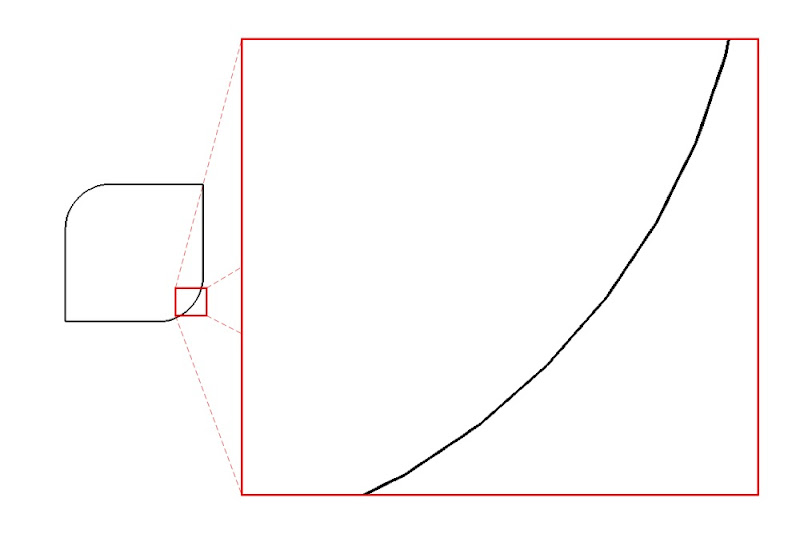 Arcs you draw in SketchUp are 12-sided by default.
When you extrude a default, 24-sided circle with the Push/Pull tool, you create a cylinder with 26 faces. Choosing View > Hidden Geometry shows the smoothed edges between the faces:
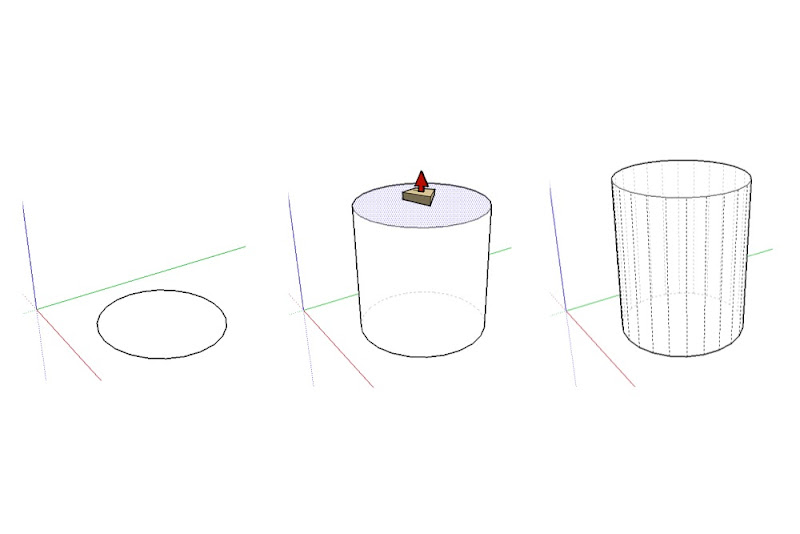 Turning on Hidden Geometry shows a default cylinder for what it really is: a 24-sided extruded polygon.
Using two default arcs and the Follow Me tool to create an fancy bullnose along the perimeter of a rectangular countertop yields no fewer than 90 new faces:
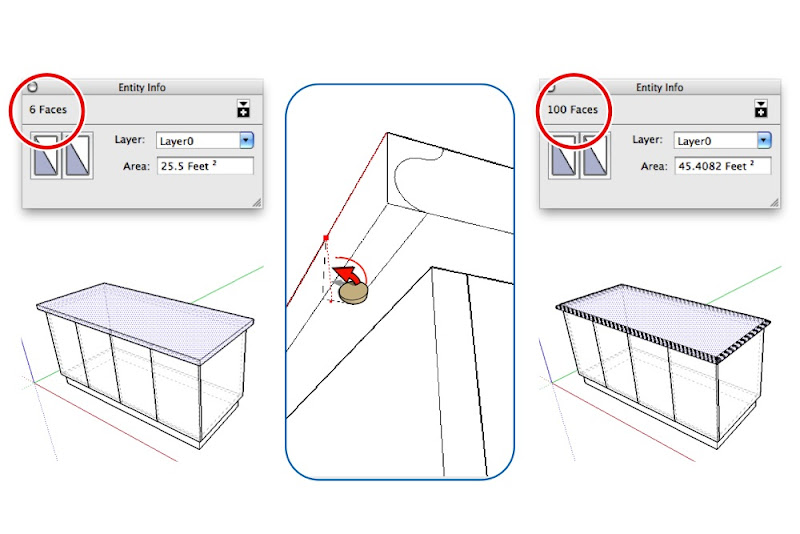 Using the Follow Me tool to extrude compound curves made out of default, 12-sided arcs results in seriously high polygon (face) counts. Thumbs-down — this is bad SketchUp practice.
Modeling a simple bike rack using a combination of 24-sided circles, 12-sided arcs and Follow Me, then placing ten of those bike racks in your design, adds more than 86,000 entities (faces and edges) to your model. Oof.
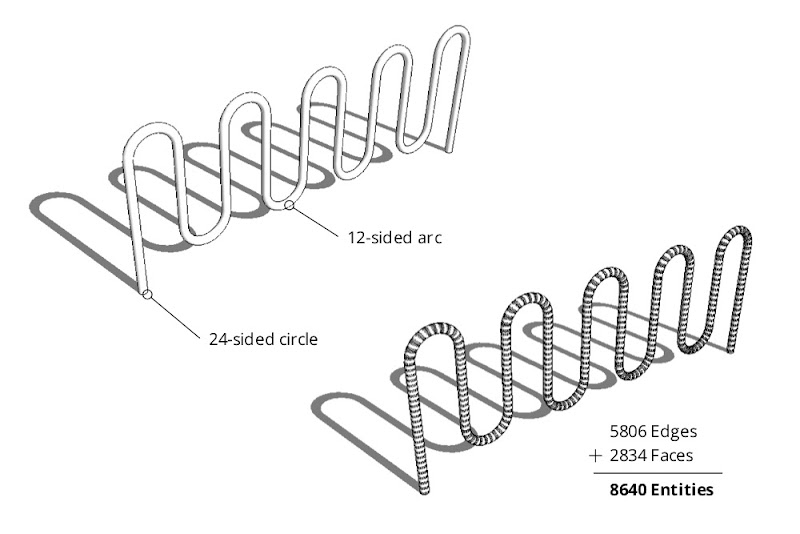 A single bike rack made by extruding a 24-sided circle along a path made from 12-sided arcs. Unless you’re designing the bike rack itself, there’s no call for adding this much geometry to your model.
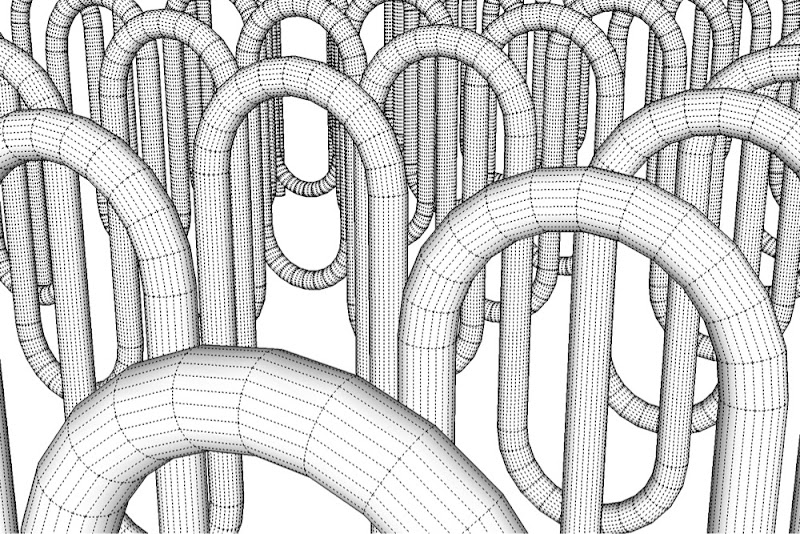 A close-up of the high-polygon bike rack. Individual faces and edges are made visible by turning on Hidden Geometry. Images like this one cause expert SketchUp modelers to have nightmares.
The Solution
To dramatically reduce the amount of geometry in your models, change the number of sides in your circles and arcs before you extrude them into 3D shapes. It’s easy:
1) Create a circle or an arc using the appropriate tool.
2) Before doing anything else, type “6s” and hit Enter.
This tells SketchUp to draw the curve you just created using six sides. The “s” tells it that you’re changing the side-count and not the radius. Of course, you don’t have to choose six sides — you can type in any number you like.
 Change the number of sides in the circles and arcs you draw. I know, I know — a hexagon isn’t a circle. Suspend your disbelief in order to have usable models.
Note: Once you’ve manually changed the number of sides in a circle or an arc, every subsequent circle or arc you draw will have that same number of sides.
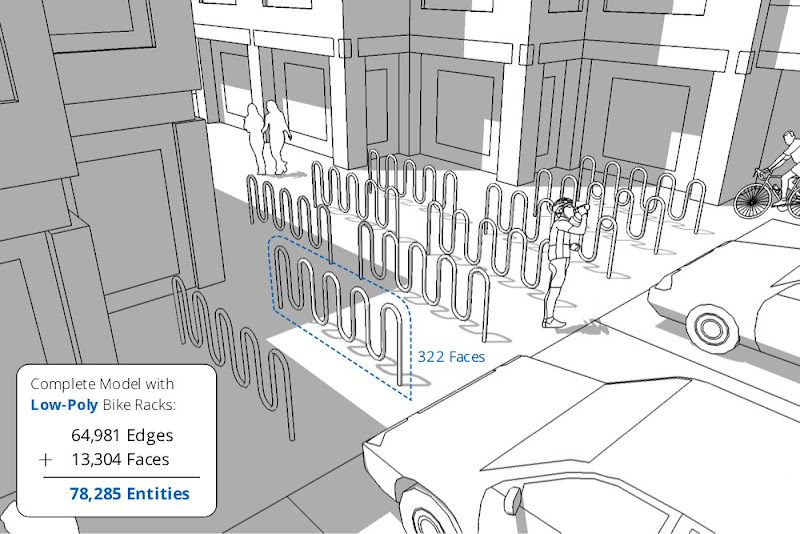
I modeled the bike rack below using 5-sided circles and 6-sided arcs. It only has 322 faces — an 89% reduction over the bike rack I modeled using curves with the default number of sides.
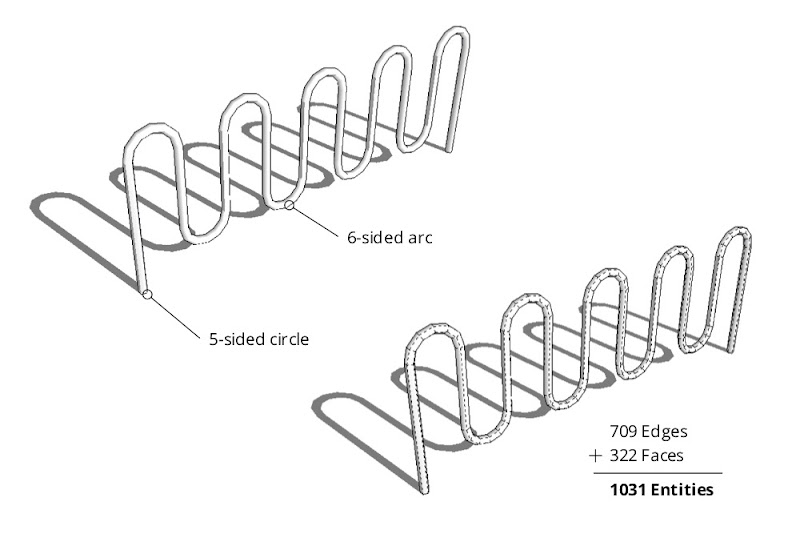 Crafting a bike rack by extruding a 5-sided circle along a path with 6-sided arcs yields a perfectly usable model with substantially fewer faces and edges.
When it’s used as context in my model, can you tell the difference between the “high-poly” (geometrically heavy) and low-poly versions? I thought not.
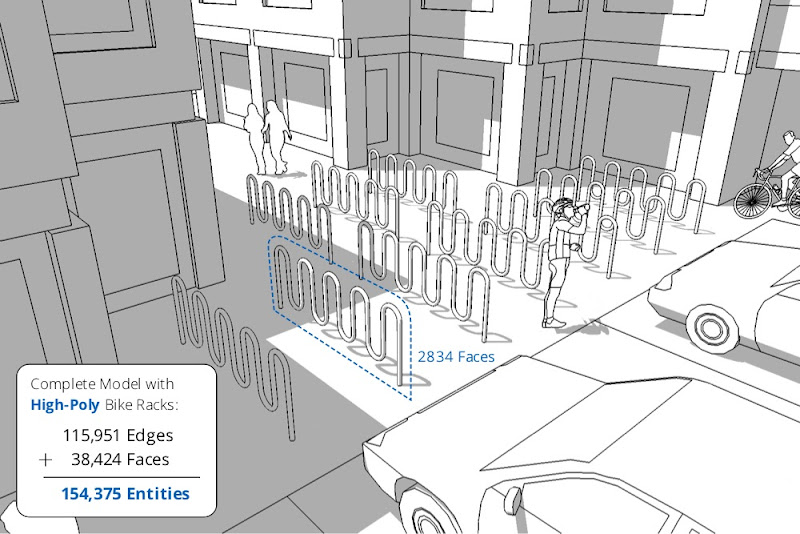
 Is the quality difference between the high-polygon (top) and low-polygon versions of the bike rack worth making your model twice as heavy? Nope.