Now you can test your Mobile Web Apps with WebDriver

Mobile testing has come a long way since the days when testing mobile web applications was mostly manual and took days to complete. Selenium WebDriver is a browser automation tool that provides an elegant way of testing web applications. WebDriver makes it easy to write automated tests that ensure your site works correctly when viewed from an Android or iOS browser.

For those of you new to WebDriver, here are a few basics about how it helps you test your web application. WebDriver tests are end-to-end tests that exercise a web application just like a real user would. There is a comprehensive user guide on the Selenium site that covers the core APIs.

Now let’s talk about mobile! WebDriver provides a touch API that allows the test to interact with the web page through finger taps, flicks, finger scrolls, and long presses. It can rotate the display and provides a friendly API to interact with HTML5 features such as local storage, session storage and application cache. Mobile WebDrivers use the remote WebDriver server, following a client/server architecture. The client piece consists of the test code, while the server piece is the application that is installed on the device.

Get Started


WebDriver for Android and iPhone can be installed following these instructions. Once you’ve done that, you will be ready to write tests. Let’s start with a basic example using www.google.com to give you a taste of what’s possible.

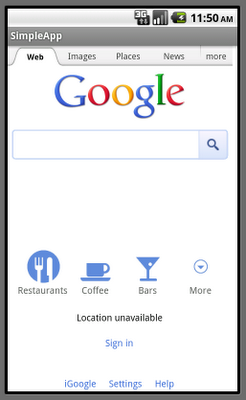
The test below opens www.google.com on Android and issues a query for “weather in san francisco”. The test will verify that Google returns search results and that the first result returned is giving the weather in San Francisco.

public void testGoogleCanGiveWeatherResults() {
// Create a WebDriver instance with the activity in which we want the test to run.
WebDriver driver = new AndroidDriver(getActivity());
// Let’s open a web page
driver.get(“http://www.google.com”);

// Lookup for the search box by its name
WebElement searchBox = driver.findElement(By.name(“q”));

// Enter a search query and submit
searchBox.sendKeys(“weather in san francisco”);
searchBox.submit();

// Making sure that Google shows 11 results
WebElement resultSection = driver.findElement(By.id(“ires”));
List searchResults = resultSection.findElements(By.tagName(“li”));
assertEquals(11, searchResults.size());

// Let’s ensure that the first result shown is the weather widget
WebElement weatherWidget = searchResults.get(0);
assertTrue(weatherWidget.getText().contains(“Weather for San Francisco, CA”));
}

Now let’s see our test in action! When you launch your test through your favorite IDE or using the command line, WebDriver will bring up a WebView in the foreground allowing you to see your web application as the test code is executing. You will see www.google.com loading, and the search query being typed in the search box.


We mentioned above that the WebDriver supports creating advanced gestures to interact with the device. Let’s use WebDriver to throw an image across the screen by flicking horizontally, and ensure that the next image in the gallery is displayed.

WebElement toFlick = driver.findElement(By.id(“image”));
// 400 pixels left at normal speed
Action flick = getBuilder(driver).flick(toFlick, 0, -400, FlickAction.SPEED_NORMAL)
.build();
flick.perform();
WebElement secondImage = driver.findElement(“secondImage”);
assertTrue(secondImage.isDisplayed());

Next, let’s rotate the screen and ensure that the image displayed on screen is resized.


assertEquals(landscapeSize, secondImage.getSize())
((Rotatable) driver).rotate(ScreenOrientation.PORTRAIT);
assertEquals(portraitSize, secondImage.getSize());

Let’s take a look at the local storage on the device, and ensure that the web application has set some key/value pairs.


// Get a handle on the local storage object
LocalStorage local = ((WebStorage) driver).getLocalStorage();
// Ensure that the key “name” is mapped
assertEquals(“testUser”, local.getItem(“name”));

What if your test reveals a bug? You can easily take a screenshot for help in future debugging:


File tempFile = ((TakesScreenshot) driver).getScreenshotAs(OutputType.FILE);

High Level Architecture

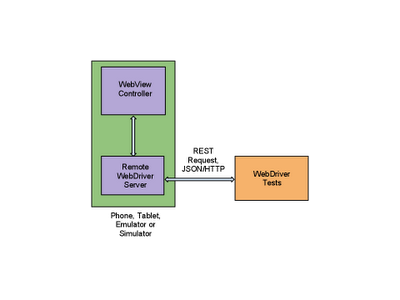
WebDriver has two main components: the server and the tests themselves. The server is an application that runs on the phone, tablet, emulator, or simulator and listens for incoming requests. It runs the tests against a WebView (the rendering component of mobile Android and iOS) configured like the browsers. Your tests run on the client side, and can be written in any languages supported by WebDriver, including Java and Python. The WebDriver tests communicate with the server by sending RESTful JSON requests over HTTP. The tests and server pieces don’t have to be on the same physical machine, although they can be. For Android you can also run the tests using the Android test framework instead of the remote WebDriver server.
Infrastructure Setup

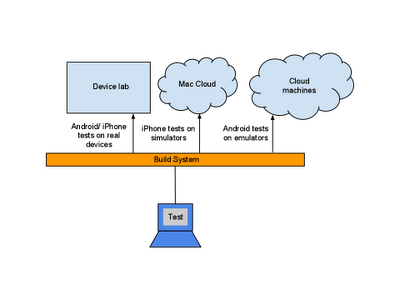
At Google, we have wired WebDriver tests to our cloud infrastructure allowing those tests to run at scale and making it possible to have them run in our continuous integration system. External developers can run their mobile tests either on emulators/simulators or real devices for Android and iOS phones and tablets.
Android emulators can run on most OSes because they are virtualized, so we run them on our generic cloud setup. Though there are many advantages to using Android emulators because they emulate a complete virtual device (including the virtual CPU, MMU, and hardware devices), it makes the test environment slower. You can speed up the tests by disabling animations, audio, skins, or even by running in the emulator headless mode. To do so, start the emulator with the options –no-boot-anim, –no-audio, –noskin, and –no-window. If you would like your tests to run even faster, start the emulator from a previously created snapshot image. That reduces the emulator startup time from 2 minutes to less than 2 seconds!
iOS simulators can’t be virtualized and hence need to run on Mac machines. However, because iOS simulators don’t try to emulate the virtual device or CPU at all, they can run as applications at “full speed,” this allows the test to run much faster.
Stay tuned for more mobile feature in Selenium WebDriver, and updates on the Selenium blog.

The iOS Blogger app

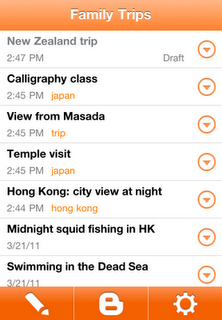
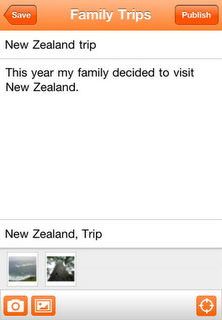
We’re excited to announce the new Blogger app for iOS. With the Blogger app, you can write a new blog post and publish it immediately or save it as a draft right from your iOS device. You can also open a blog post you’ve been working on from your computer and continue editing it while you’re on-the-go. Your blog posts are automatically synced across devices, so you’ll always have access to the latest version.

Pictures are worth a thousand words, and the Blogger app makes it easy to add photos either by choosing from the gallery or taking a new photo right within the app. You can also add labels and location to provide more details about the post.

Download the Blogger app today for iOS versions 3.2 and above in the App Store. Although the user interface is only available in English at this time, the app supports blog posts written in all languages. If you’re using an Android-powered device, you can download the Blogger app for Android from the Android Market.

Blogger Buzz blog

SightSpace 3D

Have you ever wanted to take your SketchUp models on the go? Our friends at the Boulder-based start-up, Limitless Computing, have a solution for you: their recently released SightSpace 3D app allows you to view SketchUp models on the iPad, iPhone, or iPod (Android support coming soon).
I gave it a whirl and the viewer is quite good. Orbiting a SketchUp model with single finger, panning with two, and pinching to zoom in and out is very satisfying. Loading models onto your mobile device is easy too; the Google 3D Warehouse is integrated in the app and you can also load models through Dropbox and email.

The 3D Warehouse is integrated into the app making it easy to load models

The mobile viewer would be neat enough, but SightSpace 3D’s killer feature is the Augmented Reality (AR) viewer, which gives you the ability to overlay 3D models onto the physical world. Any geo-located Google SketchUp model can be exported to a KMZ file, placed on an iPad 2 or iPhone 4, and viewed in real-time, in a real place letting you actually walk through the space. As you can imagine, this is useful for previewing construction projects, displaying kitchen designs, urban planning and much more.

An apartment complex is superimposed on undeveloped land, to scale. (Model courtesy of Hilliard Architects, San Francisco, CA)

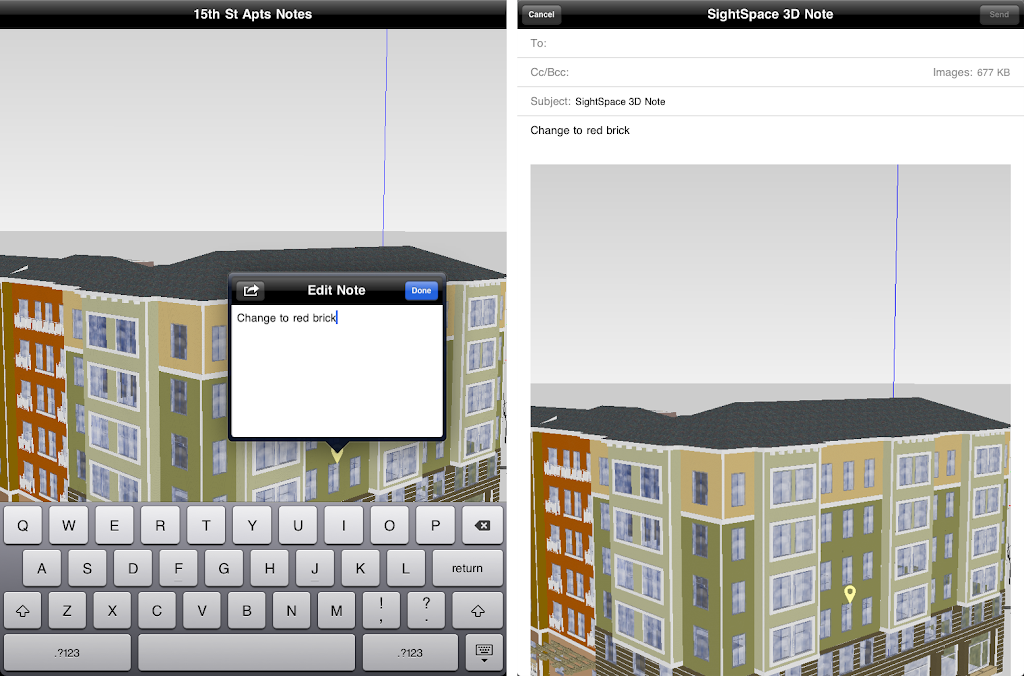
Additional features include bookmarking views, taking snapshots in both Viewer and AR mode, and the ability to annotate and email notes directly from the app.

Annotations and photos of a model get added directly to an email

SightSpace 3D is available now in the iTunes store now for $15 US, so go download it today.