Doodles for Google Apps


Since 1998, when the first doodle was released, they have been one of the most loved features of the Google home page. There have been doodles to celebrate all kinds of events, including national holidays, birthdays of artists and scientists, sports competitions, scientific discoveries and even video games! Also, doodles have evolved from simple static images to complex applications, such as the interactive electric guitar used to celebrate the birthday of Les Paul.

Want your company logo to change for selected events or holidays, just like doodles? The Admin Settings API allows domain administrators to write scripts to programmatically change the logo of their Google Apps domain, and Google App Engine offers the ability to configure regularly scheduled tasks, so that those scripts can run automatically every day.

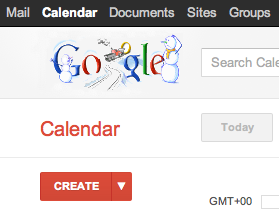
With these two pieces combined, it is pretty easy to implement a complete solution to change the domain logo on a daily basis (assuming the graphic designers have prepared a doodle for each day), as in the following screenshot:


Let’s start with a Python App Engine script called doodleapps.py:

import gdata.apps.adminsettings.service
from google.appengine.ext import webapp
from google.appengine.ext.webapp import util
from datetime import date

class DoodleHandler(webapp.RequestHandler):
  # list of available doodles
  DOODLES = {    
    '1-1': 'images/newyearsday.jpg',
    '2-14': 'images/valentinesday.jpg',
    '10-31': 'images/halloween.jpg',
    '12-25': 'images/christmas.jpg'
  }

  # returns the path to the doodle corresponding to the date
  # or None if no doodle is available
  def getHolidayDoodle(self, date):
    key = '%s-%s' % (date.month, date.day)
    if key not in self.DOODLES:
      return None

    return self.DOODLES[key]

  # handles HTTP requests by setting today’s doodle
  def get(self):
    doodle = self.getHolidayDoodle(date.today())
    self.response.out.write(doodle)

    if doodle:
      service = gdata.apps.adminsettings.service.AdminSettingsService()
      // replace domain, email and password with your credentials
      // or change the authorization mechanism to use OAuth
      service.domain = 'MYDOMAIN.COM'
      service.email = 'ADMIN@MYDOMAIN.COM'
      service.password = 'MYPASSWORD'
      service.source = 'DoodleApps'
      service.ProgrammaticLogin()

      # reads the doodle image and update the domain logo
      doodle_bytes = open(doodle, "rb").read()
      service.UpdateDomainLogo(doodle_bytes)

# webapp initialization
def main():
    application = webapp.WSGIApplication([('/', DoodleHandler)],
                                         debug=True)
    util.run_wsgi_app(application)

if __name__ == '__main__':
    main()

The script uses a set of predefined doodles which can be edited to match your list of images or replaced with more sophisticated logic, such as using the Google Calendar API to get the list of holidays in your country.

Every time the script is triggered by an incoming HTTP request, it will check whether a doodle for the date is available and, if there is one, update the domain logo using the Admin Settings API.

In order for this script to be deployed on App Engine, you need to to configure the application by defining a app.yaml file with the following content:

application: doodleapps
version: 1
runtime: python
api_version: 1

handlers:
- url: .*
  script: doodleapps.py

We want the script to run automatically every 24 hours, without the need for the administrator to send a request, so we also have to define another configuration file called cron.yaml:

cron:
- description: daily doodle update
  url: /
  schedule: every 24 hours

Once the application is deployed on App Engine, it will run the script on a daily basis and update the logo.

The magic of gzip compression

All developers agree that saving bandwidth is a critical factor for the success of a mobile application. Less data usage means faster response times and also lower costs for the users as the vast majority of mobile data plans are limited or billed on a per-usage basis.

When using any of the Google Data APIs in your application, you can reduce the amount of data to be transferred by requesting gzip-encoded responses. On average, the size of a page of users returned by the Provisioning API (100 accounts) is about 100 Kb, while the same data, gzip-encoded, is about 5 Kb — 20 times smaller! When you can reduce data sizes at this dramatic scale, the benefits of compression will often outweigh any costs in client-side processing for decompression.

Enabling gzip-encoding in your application requires two steps. You have to edit the User-Agent

string to contain the value gzip

and you must also include an Accept-Encoding

header with the same value. For example:

User-Agent: my application - gzip

Accept-Encoding: gzip

Client libraries for the various supported programming languages make enabling gzip-encoded responses even easier. For instance, in the .NET client library it is as easy as setting the boolean UseGZip flag of the RequestFactory object:

service.RequestFactory.UseGZip = true;

For any questions, please get in touch with us in the respective forum for the API you’re using.

Now you can test your Mobile Web Apps with WebDriver

Mobile testing has come a long way since the days when testing mobile web applications was mostly manual and took days to complete. Selenium WebDriver is a browser automation tool that provides an elegant way of testing web applications. WebDriver makes it easy to write automated tests that ensure your site works correctly when viewed from an Android or iOS browser.

For those of you new to WebDriver, here are a few basics about how it helps you test your web application. WebDriver tests are end-to-end tests that exercise a web application just like a real user would. There is a comprehensive user guide on the Selenium site that covers the core APIs.

Now let’s talk about mobile! WebDriver provides a touch API that allows the test to interact with the web page through finger taps, flicks, finger scrolls, and long presses. It can rotate the display and provides a friendly API to interact with HTML5 features such as local storage, session storage and application cache. Mobile WebDrivers use the remote WebDriver server, following a client/server architecture. The client piece consists of the test code, while the server piece is the application that is installed on the device.

Get Started


WebDriver for Android and iPhone can be installed following these instructions. Once you’ve done that, you will be ready to write tests. Let’s start with a basic example using www.google.com to give you a taste of what’s possible.

The test below opens www.google.com on Android and issues a query for “weather in san francisco”. The test will verify that Google returns search results and that the first result returned is giving the weather in San Francisco.

public void testGoogleCanGiveWeatherResults() {
// Create a WebDriver instance with the activity in which we want the test to run.
WebDriver driver = new AndroidDriver(getActivity());
// Let’s open a web page
driver.get(“http://www.google.com”);

// Lookup for the search box by its name
WebElement searchBox = driver.findElement(By.name(“q”));

// Enter a search query and submit
searchBox.sendKeys(“weather in san francisco”);
searchBox.submit();

// Making sure that Google shows 11 results
WebElement resultSection = driver.findElement(By.id(“ires”));
List searchResults = resultSection.findElements(By.tagName(“li”));
assertEquals(11, searchResults.size());

// Let’s ensure that the first result shown is the weather widget
WebElement weatherWidget = searchResults.get(0);
assertTrue(weatherWidget.getText().contains(“Weather for San Francisco, CA”));
}

Now let’s see our test in action! When you launch your test through your favorite IDE or using the command line, WebDriver will bring up a WebView in the foreground allowing you to see your web application as the test code is executing. You will see www.google.com loading, and the search query being typed in the search box.


We mentioned above that the WebDriver supports creating advanced gestures to interact with the device. Let’s use WebDriver to throw an image across the screen by flicking horizontally, and ensure that the next image in the gallery is displayed.

WebElement toFlick = driver.findElement(By.id(“image”));
// 400 pixels left at normal speed
Action flick = getBuilder(driver).flick(toFlick, 0, -400, FlickAction.SPEED_NORMAL)
.build();
flick.perform();
WebElement secondImage = driver.findElement(“secondImage”);
assertTrue(secondImage.isDisplayed());

Next, let’s rotate the screen and ensure that the image displayed on screen is resized.


assertEquals(landscapeSize, secondImage.getSize())
((Rotatable) driver).rotate(ScreenOrientation.PORTRAIT);
assertEquals(portraitSize, secondImage.getSize());

Let’s take a look at the local storage on the device, and ensure that the web application has set some key/value pairs.


// Get a handle on the local storage object
LocalStorage local = ((WebStorage) driver).getLocalStorage();
// Ensure that the key “name” is mapped
assertEquals(“testUser”, local.getItem(“name”));

What if your test reveals a bug? You can easily take a screenshot for help in future debugging:


File tempFile = ((TakesScreenshot) driver).getScreenshotAs(OutputType.FILE);

High Level Architecture

WebDriver has two main components: the server and the tests themselves. The server is an application that runs on the phone, tablet, emulator, or simulator and listens for incoming requests. It runs the tests against a WebView (the rendering component of mobile Android and iOS) configured like the browsers. Your tests run on the client side, and can be written in any languages supported by WebDriver, including Java and Python. The WebDriver tests communicate with the server by sending RESTful JSON requests over HTTP. The tests and server pieces don’t have to be on the same physical machine, although they can be. For Android you can also run the tests using the Android test framework instead of the remote WebDriver server.

Infrastructure Setup

At Google, we have wired WebDriver tests to our cloud infrastructure allowing those tests to run at scale and making it possible to have them run in our continuous integration system. External developers can run their mobile tests either on emulators/simulators or real devices for Android and iOS phones and tablets.
Android emulators can run on most OSes because they are virtualized, so we run them on our generic cloud setup. Though there are many advantages to using Android emulators because they emulate a complete virtual device (including the virtual CPU, MMU, and hardware devices), it makes the test environment slower. You can speed up the tests by disabling animations, audio, skins, or even by running in the emulator headless mode. To do so, start the emulator with the options –no-boot-anim, –no-audio, –noskin, and –no-window. If you would like your tests to run even faster, start the emulator from a previously created snapshot image. That reduces the emulator startup time from 2 minutes to less than 2 seconds!
iOS simulators can’t be virtualized and hence need to run on Mac machines. However, because iOS simulators don’t try to emulate the virtual device or CPU at all, they can run as applications at “full speed,” this allows the test to run much faster.
Stay tuned for more mobile feature in Selenium WebDriver, and updates on the Selenium blog.