The Changes to OAuth 2.0 endpoint


In the coming weeks we will be making three changes to the experimental OAuth 2.0 endpoint. We expect the impact to be minimal, and we’re emailing developers who are most likely to be affected.

We will be releasing these changes on November 15, 2011. This post describes the changes, their impact, and how they can be mitigated.

Change #1: Error responses for client-side web applications

The first change relates to the way errors are returned in OAuth 2.0 client-side web applications. It does not impact server-side, native, or device flows.

The current behavior of the OAuth 2.0 endpoint in certain error conditions is to return the error to the application as a query string parameter, for example:

https://www.example.com/back?error=access_denied.

The OAuth 2.0 specification indicates that the error should be returned in the fragment of the response. We are updating our OAuth 2.0 implementation to support the most recent draft of the specification. As a result, we will be changing the way we return errors to applications in the client-side flow.

As an example, today an error returns to your application as

https://www.example.com/back?error=access_denied. After this change, it will be returned as

https://www.example.com/back#error=access_denied.

There is no mitigation for this change, so your application will have to handle these types of errors in client-side script.

Change #2: Offline access as a separate parameter

The second change impacts the OAuth 2.0 server-side flow only. It does not impact client-side, native, or device flows. For context, this flow consists of the following steps:

  1. Redirect the browser to the Google OAuth 2.0 endpoint.
  2. The user will be shown a consent page.
  3. If the user consents, parse the authorization code from the query string of the response.
  4. Exchange the authorization code for a short-lived access token and a long-lived refresh token.

Once your application has obtained a long-lived refresh token (step 4), it may access a Google API at any time. This means server-side applications do not require the end-user to be present when obtaining new access tokens. We’re calling this type of access offline.

The client-side flow, in contrast, requires the user to be present when obtaining an access token. This type of access is called online.

With this change, we will be exposing online and offline access as a separate parameter that’s available only in the server-side flow.

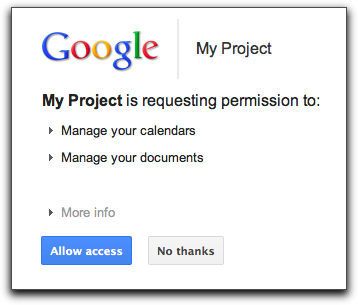
When your application requests offline access, the consent page shown to a user will reflect that your application requests offline access and your application will receive an access and a refresh token. Once your application has a refresh token, it may obtain a new access token at any time.

When your application requests online access, your application will only receive an access token. No refresh token will be returned. This means that a user must be present in order for your application to obtain a new access token.

If unspecified in the request, online is the default.

A mitigation for this change is described at the end of this post.

Change #3: Server-side auto-approval

This change also impacts the OAuth 2.0 server-side flow only.

In the current implementation of OAuth2, every time your application redirects a user to Google, that user must give explicit consent before an authorization code is given to your application. As a result, sending a user through the flow another time requires them to see the consent screen again. Most applications don’t do this, but rather use the existing server-side flow as it was intended: a one-time association (import contacts, calendar operations, etc.) where the result is a refresh token which may be used to obtain new access tokens.

The behavior is changing to the following:

  • Users will only see the consent screen on their first time through the sequence.
  • If the application requests offline access, only the first authorization code exchange results in a refresh token.

To put it another way, consent will be auto-approved for returning users unless the user has revoked access. Refresh tokens are not returned for responses that were auto-approved.

The next section describes how to mitigate this change.

Mitigation of offline access (#2) and auto-approval (#3) changes

If you want to keep the existing behavior in your server-side applications, include the approval_prompt=force and access_type=offline parameters in an authorization code request.

For example, if the following is a target URL for obtaining an authorization code today:

https://accounts.google.com/o/oauth2/auth?
client_id=21302922996.apps.googleusercontent.com&
redirect_uri=https://www.example.com/back&
scope=https://www.google.com/m8/feeds/&
response_type=code

You can maintain the current behavior by changing the target URL to:

https://accounts.google.com/o/oauth2/auth?
client_id=21302922996.apps.googleusercontent.com&
redirect_uri=https://www.example.com/back&
scope=https://www.google.com/m8/feeds/&
response_type=code&
access_type=offline&
approval_prompt=force

You may start including these parameters in authorization code requests today.

OAuth 2.0, Python & Google Data APIs


Since March of this year, Google has supported OAuth 2.0 for many APIs, including Google Data APIs such as Google Calendar, Google Contacts and Google Documents List. Google’s implementation of OAuth 2.0 introduces many advantages compared to OAuth 1.0 such as simplicity for developers and a more polished user experience.

We’ve just added support for this authorization mechanism to the gdata-python-client library– let’s take a look at how it works by retrieving an access token for the Google Calendar and Google Documents List APIs and listing protected data.

Getting Started

First, you will need to retrieve or sync the project from the repository using Mercurial:

hg clone https://code.google.com/p/gdata-python-client/

For more information about installing this library, please refer to the Getting Started With the Google Data Python Library article.

Now that the client library is installed, you can go to your APIs Console to either create a new project, or use information about an existing one from the API Access pane:

Getting the Authorization URL

Your application will require the user to grant permission for it to access protected APIs on their behalf. It must redirect the user over to Google’s authorization server and specify the scopes of the APIs it is requesting permission to access.

Available Google Data API’s scopes are listed in the Google Data FAQ.

Here’s how your application can generate the appropriate URL and redirect the user:

import gdata.gauth

# The client id and secret can be found on your API Console.
CLIENT_ID = ''
CLIENT_SECRET = ''

# Authorization can be requested for multiple APIs at once by specifying multiple scopes separated by # spaces.
SCOPES = ['https://docs.google.com/feeds/', 'https://www.google.com/calendar/feeds/']  
USER_AGENT = ''

# Save the token for later use.
token = gdata.gauth.OAuth2Tokens(
   client_id=CLIENT_ID, client_secret=CLIENT_SECRET, scope=' '.join(SCOPES),
   user_agent=USER_AGENT)

# The “redirect_url” parameter needs to match the one you entered in the API Console and points
# to your callback handler.
self.redirect(
    token.generate_authorize_url(redirect_url='http://www.example.com/oauth2callback'))

If all the parameters match what has been provided by the API Console, the user will be shown this dialog:

When an action is taken (e.g allowing or declining the access), Google’s authorization server will redirect the user to the specified redirect URL and include an authorization code as a query parameter. Your application then needs to make a call to Google’s token endpoint to exchange this authorization code for an access token.

Getting an Access Token

import atom.http_core

url = atom.http_core.Uri.parse_uri(self.request.uri)
if 'error' in url.query:
  # The user declined the authorization request.
  # Application should handle this error appropriately.
  pass
else:
# This is the token instantiated in the first section.
  token.get_access_token(url.query)

The redirect handler retrieves the authorization code that has been returned by Google’s authorization server and exchanges it for a short-lived access token and a long-lived refresh token that can be used to retrieve a new access token. Both access and refresh tokens are to be kept private to the application server and should never be revealed to other client applications or stored as a cookie.

To store the token object in a secured datastore or keystore, the gdata.gauth.token_to_blob() function can be used to serialize the token into a string. The gdata.gauth.token_from_blob() function does the opposite operation and instantiate a new token object from a string.

Calling Protected APIs

Now that an access token has been retrieved, it can be used to authorize calls to the protected APIs specified in the scope parameter.

import gdata.calendar.client
import gdata.docs.client

# Access the Google Calendar API.
calendar_client = gdata.calendar.client.CalendarClient(source=USER_AGENT)
# This is the token instantiated in the first section.
calendar_client = token.authorize(calendar_client)
calendars_feed = client.GetCalendarsFeed()
for entry in calendars_feed.entry:
  print entry.title.text

# Access the Google Documents List API.
docs_client = gdata.docs.client.DocsClient(source=USER_AGENT)
# This is the token instantiated in the first section.
docs_client = token.authorize(docs_client)
docs_feed = client.GetDocumentListFeed()
for entry in docs_feed.entry:
  print entry.title.text

Gmail Inbox Feed with .NET and OAuth

Gmail servers support the standard IMAP and POP protocols for email retrieval but sometimes you only need to know whether there are any new messages in your inbox. Using any of the two protocols mentioned above may seem like an overkill in this scenario and that’s why Gmail also exposes a read only feed called Gmail Inbox Feed which you can subscribe to and get the list of unread messages in your inbox.

The Gmail Inbox Feed is easily accessible by pointing your browser to https://mail.google.com/mail/feed/atom and authenticating with your username and password if you are not already logged in.

Using basic authentication to access the inbox feed doesn’t provide a very good user experience if we want delegated access. In that case, we should instead rely on the OAuth authorization standard, which is fully supported by the Gmail Inbox Feed.

OAuth supports two different flows. With 3-legged OAuth, an user can give access to a resource he owns to a third-party application without sharing his credentials. The 2-legged flow, instead, resembles a client-server scenario where the application is granted domain-wide access to a resource.

Let’s write a .NET application that uses 2-legged OAuth to access the Gmail Inbox Feed for a user in the domain and list unread emails. This authorization mechanism also suits Google Apps Marketplace developers who want to add inbox notifications to their applications.

There is no dedicated client library for this task and the Inbox Feed is not based on the Google Data API protocol but we’ll still use the .NET library for Google Data APIs for its OAuth implementation.

Step-by-Step

First, create a new C# project and add a reference to the Google.GData.Client.dll released with the client library. Then add the following using directives to your code:

using System;
using System.Linq;
using System.Net;
using System.Net.Mail;
using System.Xml;
using System.Xml.Linq;
using Google.GData.Client;

The next step is to use 2-legged OAuth to send an authorized GET request to the feed URL. In order to do this, we need our domain’s consumer key and secret and the username of the user account we want to access the inbox feed for.

string CONSUMER_KEY = "mydomain.com";
string CONSUMER_SECRET = "my_consumer_secret";
string TARGET_USER = "test_user";

OAuth2LeggedAuthenticator auth = new OAuth2LeggedAuthenticator("GmailFeedReader", CONSUMER_KEY, CONSUMER_SECRET
, TARGET_USER, CONSUMER_KEY);
HttpWebRequest request = auth.CreateHttpWebRequest("GET", new Uri("https://mail.google.com/mail/feed/atom/"));
HttpWebResponse response = request.GetResponse() as HttpWebResponse;

The response is going to be a standard Atom 0.3 feed, i.e. an xml document that we can load into an XDocument using the standard XmlReader class:

XmlReader reader = XmlReader.Create(response.GetResponseStream());
XDocument xdoc = XDocument.Load(reader);
XNamespace xmlns = "http://purl.org/atom/ns#";

All the parsing can be done with a single LINQ to XML instruction, which iterates the entries and instantiates a new MailMessage object for each email, setting its Subject, Body and From properties with the corresponding values in the feed:

var messages = from entry in xdoc.Descendants(xmlns + "entry")
               from author in entry.Descendants(xmlns + "author")
               select new MailMessage() {
                   Subject = entry.Element(xmlns + "title").Value,
                   Body = entry.Element(xmlns + "summary").Value,
                   From = new MailAddress(
                       author.Element(xmlns + "email").Value,
                       author.Element(xmlns + "name").Value)
               };

At this point, messages will contain a collection of MailMessage instances that we can process or simply dump to the console as in the following snippet:

Console.WriteLine("Number of messages: " + messages.Count());
foreach (MailMessage entry in messages) {
    Console.WriteLine();
    Console.WriteLine("Subject: " + entry.Subject);
    Console.WriteLine("Summary: " + entry.Body);
    Console.WriteLine("Author: " + entry.From);
}

If you have any questions about how to use the Google Data APIs .NET Client Library to access the Gmail Inbox Feed, please post them in the client library discussion group.