Android’s New Public APIs in ICS


Since Android is open-source, anyone can look at the code and see how it works inside. If you do this, you’ll notice that most but not all of the APIs arepublicly documented.

If they’re publicly documented, they’re part of what we consider the Android Application Framework. This means their tests appear in the Compatibility Test Suite (CTS) so that our hardware partners have to prove that the APIs work, and that we promise to try very hard not to change them and thus break your code.

In almost every case, there’s only one reason for leaving APIs undocumented: We’re not sure that what we have now is the best solution, and we think we might have to improve it, and we’re not prepared to make those commitments to testing and preservation.

We’re not claiming that they’re “Private” or “Secret” — How could they be, when anyone in the world can discover them? We’re also not claiming they’re forbidden: If you use them, your code will compile and probably run. And in fact we know of quite a few apps out there whose developers have used undocumented APIs, often to good effect. It’s hard to get too upset about this in cases where there’s a useful API that we haven’t gotten around to stabilizing.

But the developers who use those APIs have to be prepared to deal with the situation that arises when we move them from the undocumented outside into the Android Application Framework. Fortunately, this is reasonably straightforward. Also we take a close look at Android Market, using our in-house analytics tools, to get a feel for the impact when we know one of these changes is coming.

There are a few such changes coming up in the Android 4.0 “Ice Cream Sandwich” (ICS) release of Android. We wanted to take the opportunity to combine these words on undocumented APIs with some specifics about the changes.

Calendars

Let’s start with the good news: As of ICS, the Android Framework will include a fully-worked-out set of APIs for accessing Calendar data. You can guess the bad news: Quite a few developers have built apps (including many good ones) using the undocumented Calendar APIs, some using fairly low-level access to the calendar database. Unfortunately, these integrations were unsupported, and prone to breakage by platform updates or OEM customization of calendar features.

We want to see lots of good calendar apps and extensions that work reliably across Android devices, and aren’t broken by platform updates. So we decided to create a clean API, including a comprehensive set of Intents, to manage calendar data in ICS. Now anyone can code against these new APIs and know that Android is committed to supporting them, and that partners have to support these APIs as part of CTS.

Once the new APIs arrive, you’re going to have to update your apps before they’ll run correctly on ICS while still working on older releases. There are a variety of techniques for doing that, many of which have been featured on this blog, including reflection and lazy loading. Recently, we introduced Multiple-APK support, which could also be used to help with this sort of transition.

Text To Speech

Android has never really had a text-to-speech API at the Framework level, but there was unofficial access at the C++ level. With ICS, we will have a fully-thought-through application-level API running on Dalvik, so you can access it with ordinary Java-language application code.

The old C++ API will no longer be supported, but we’ll have a compatibility layer that you can use to bridge from it to the new API. We think it should be easy to update for ICS with very little work.

Doing the Right Thing

We recognize that this means some work for developers affected by these changes, but we’re confident that Android programs in general, and both Calendar and TTS apps in particular, will come out ahead. And we also think that most developers know that when they use undocumented APIs, they’re making a commitment to doing the right thing when those APIs change.

 

Gmail Inbox Feed with .NET and OAuth

Gmail servers support the standard IMAP and POP protocols for email retrieval but sometimes you only need to know whether there are any new messages in your inbox. Using any of the two protocols mentioned above may seem like an overkill in this scenario and that’s why Gmail also exposes a read only feed called Gmail Inbox Feed which you can subscribe to and get the list of unread messages in your inbox.

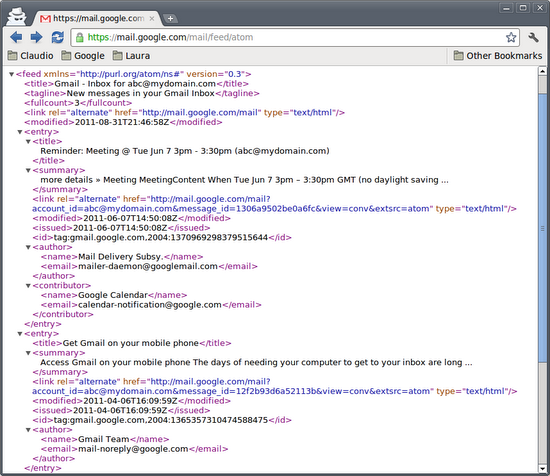
The Gmail Inbox Feed is easily accessible by pointing your browser to https://mail.google.com/mail/feed/atom and authenticating with your username and password if you are not already logged in.

Using basic authentication to access the inbox feed doesn’t provide a very good user experience if we want delegated access. In that case, we should instead rely on the OAuth authorization standard, which is fully supported by the Gmail Inbox Feed.

OAuth supports two different flows. With 3-legged OAuth, an user can give access to a resource he owns to a third-party application without sharing his credentials. The 2-legged flow, instead, resembles a client-server scenario where the application is granted domain-wide access to a resource.

Let’s write a .NET application that uses 2-legged OAuth to access the Gmail Inbox Feed for a user in the domain and list unread emails. This authorization mechanism also suits Google Apps Marketplace developers who want to add inbox notifications to their applications.

There is no dedicated client library for this task and the Inbox Feed is not based on the Google Data API protocol but we’ll still use the .NET library for Google Data APIs for its OAuth implementation.

Step-by-Step

First, create a new C# project and add a reference to the Google.GData.Client.dll released with the client library. Then add the following using directives to your code:

using System;
using System.Linq;
using System.Net;
using System.Net.Mail;
using System.Xml;
using System.Xml.Linq;
using Google.GData.Client;

The next step is to use 2-legged OAuth to send an authorized GET request to the feed URL. In order to do this, we need our domain’s consumer key and secret and the username of the user account we want to access the inbox feed for.

string CONSUMER_KEY = "mydomain.com";
string CONSUMER_SECRET = "my_consumer_secret";
string TARGET_USER = "test_user";

OAuth2LeggedAuthenticator auth = new OAuth2LeggedAuthenticator("GmailFeedReader", CONSUMER_KEY, CONSUMER_SECRET
, TARGET_USER, CONSUMER_KEY);
HttpWebRequest request = auth.CreateHttpWebRequest("GET", new Uri("https://mail.google.com/mail/feed/atom/"));
HttpWebResponse response = request.GetResponse() as HttpWebResponse;

The response is going to be a standard Atom 0.3 feed, i.e. an xml document that we can load into an XDocument using the standard XmlReader class:

XmlReader reader = XmlReader.Create(response.GetResponseStream());
XDocument xdoc = XDocument.Load(reader);
XNamespace xmlns = "http://purl.org/atom/ns#";

All the parsing can be done with a single LINQ to XML instruction, which iterates the entries and instantiates a new MailMessage object for each email, setting its Subject, Body and From properties with the corresponding values in the feed:

var messages = from entry in xdoc.Descendants(xmlns + "entry")
               from author in entry.Descendants(xmlns + "author")
               select new MailMessage() {
                   Subject = entry.Element(xmlns + "title").Value,
                   Body = entry.Element(xmlns + "summary").Value,
                   From = new MailAddress(
                       author.Element(xmlns + "email").Value,
                       author.Element(xmlns + "name").Value)
               };

At this point, messages will contain a collection of MailMessage instances that we can process or simply dump to the console as in the following snippet:

Console.WriteLine("Number of messages: " + messages.Count());
foreach (MailMessage entry in messages) {
    Console.WriteLine();
    Console.WriteLine("Subject: " + entry.Subject);
    Console.WriteLine("Summary: " + entry.Body);
    Console.WriteLine("Author: " + entry.From);
}

If you have any questions about how to use the Google Data APIs .NET Client Library to access the Gmail Inbox Feed, please post them in the client library discussion group.

Bing Maps v7 AJAX control Infobox positioning

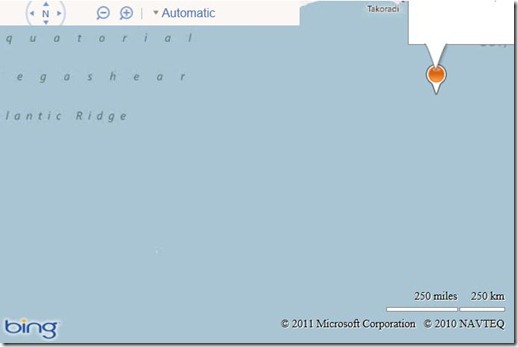
In the Bing Maps v7 AJAX control, when you open an infobox it will open up where it is positioned. If you are near the edges of the map it will go beyond the edges and end up getting cut of, out of view as the infobox is within the map div which hides any overflowing elements. Here is an example.

infobox1

This might not be the ideal default case, but Bing Maps is developed in such a way that it tries to give you the basic use case and all the tools needed to create the experience you want. One way around this is to use the Custom Infobox Control module for Bing Maps that will change the direction of the infobox so that it appears towards the center of the map. This works well in some cases, but completely ignores the built in infobox control and requires jQuery.

For those migrating from Multimap you may prefer the map to reposition so that the infobox comes into view. This is a user experience that others would prefer as the infobox will always render in the same way. The following code uses the built in infobox properties to determine if the infobox needs to be repositioned and if it does it moves the map so that the infobox comes into view.

[php]
<!DOCTYPE html PUBLIC "-//W3C//DTD XHTML 1.0 Transitional//EN" "http://www.w3.org/TR/xhtml1/DTD/xhtml1-transitional.dtd">
<html>
<head>
<title></title>
<meta http-equiv="Content-Type" content="text/html; charset=utf-8">

<script type="text/javascript" src="http://ecn.dev.virtualearth.net/mapcontrol/mapcontrol.ashx?v=7.0"></script>

<script type="text/javascript">
var map = null;
var pinLayer, pinInfobox;

function GetMap() {
// Initialize the map
map = new Microsoft.Maps.Map(document.getElementById("myMap"), { credentials: "YOUR_BING_MAPS_KEY", zoom: 5 });

//Create two layers, one for pushpins, the other for the infobox. This way the infobox will always be above the pushpins.
pinLayer = new Microsoft.Maps.EntityCollection();
map.entities.push(pinLayer);

var infoboxLayer = new Microsoft.Maps.EntityCollection();
map.entities.push(infoboxLayer);

// Create the info box for the pushpin
pinInfobox = new Microsoft.Maps.Infobox(new Microsoft.Maps.Location(0, 0), { visible: false });
infoboxLayer.push(pinInfobox);

//Create a test pushpiin
var pin = new Microsoft.Maps.Pushpin(map.getCenter());
pin.Title = ‘This is pin 1’;
pin.Description = ‘Pan map so pin is at edge and then click on pin.’;

Microsoft.Maps.Events.addHandler(pin, ‘click’, displayInfobox);
pinLayer.push(pin);
}

function displayInfobox(e) {
if (e.targetType == "pushpin") {
pinInfobox.setOptions({ title: e.target.Title, description: e.target.Description, visible: true, offset: new Microsoft.Maps.Point(0, 25) });
pinInfobox.setLocation(e.target.getLocation());

//A buffer limit to use to specify the infobox must be away from the edges of the map.
var buffer = 25;

var infoboxOffset = pinInfobox.getOffset();
var infoboxAnchor = pinInfobox.getAnchor();
var infoboxLocation = map.tryLocationToPixel(e.target.getLocation(), Microsoft.Maps.PixelReference.control);

var dx = infoboxLocation.x + infoboxOffset.x – infoboxAnchor.x;
var dy = infoboxLocation.y – 25 – infoboxAnchor.y;

if (dy < buffer) { //Infobox overlaps with top of map.
//Offset in opposite direction.
dy *= -1;

//add buffer from the top edge of the map.
dy += buffer;
} else {
//If dy is greater than zero than it does not overlap.
dy = 0;
}

if (dx < buffer) { //Check to see if overlapping with left side of map.
//Offset in opposite direction.
dx *= -1;

//add a buffer from the left edge of the map.
dx += buffer;
} else { //Check to see if overlapping with right side of map.
dx = map.getWidth() – infoboxLocation.x + infoboxAnchor.x – pinInfobox.getWidth();

//If dx is greater than zero then it does not overlap.
if (dx > buffer) {
dx = 0;
} else {
//add a buffer from the right edge of the map.
dx -= buffer;
}
}

//Adjust the map so infobox is in view
if (dx != 0 || dy != 0) {
map.setView({ centerOffset: new Microsoft.Maps.Point(dx, dy), center: map.getCenter() });
}
}
}
</script>
</head>
<body onload="GetMap();">
<div id=’myMap’ style="position:relative; width:600px; height:400px;"></div>
</html>
[/php]

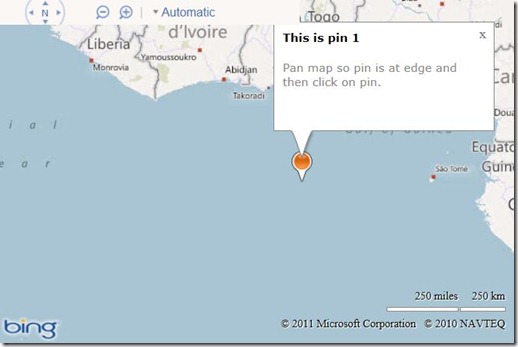
When you load this code into a browser a pushpin will appear in the center of the map. Pan the map so that the infobox is near one of the edges. When you click on the pushpin to open the infobox you will see the map reposition such that the infobox comes into view. The example below is the result of opening the infobox when the pushpin was in the top right corner of the map.