Dreamweaver for Google Earth

I noticed that Declan wrote up an idea we kicked around in September (see ‘September’ on the DigitalPlanet pages), so I thought it deserved a post. I referred to it then as ‘Dreamweaver for KML.
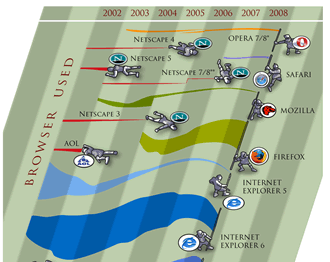
Image courtesy of favbrowser. A bit out of date but still interesting.

Browser History: In 1997 Netscape adds a feature to its Netscape communicator browser that allowed for WYSIWYG simple production of html web pages. To put that in context you have to recall that this was the late days of the browser wars between Microsoft and Netscape. Then in March 1998 Macromedia release dreamweaver 1, this allowed web pages to be created in WYSIWYG or code views and produced short cuts that produced elegant html. It was also extensible so you could write a ‘macro’ to produce custom HTML. Developers loved it.

Geo-Browser History: My point is that if you regard GEarth as a geo-browser then the history is similar. Today in GEarth you can create simple maps and tours just like in Netscape communicator you could create simple web pages. However, a lot of sophisticated features such as time, region control, pauses in tours need to be hand coded into the KML. There are a few tools out there that allow you to produce KML without hand coding such as the spreadsheet mapper, my spreadsheet for adding loops and a tool for adding screen overlays but these are all limited in scope.
Tool Description: An obvious improvement would be ‘Dreamweaver for Google Earth’, where all this functionality was combined into one specialist KML producing program just as dreamweaver was a specialist HTML producing program. It would need to be:
  • WYSIWYG, ie be able to write code directly or using wizards and then see the result in an instance of the GE API
  • Extensible allowing you to write an extension that produced your favourite snippet of KML structure.
  • Elegant, highly usable and producing well formed KML code
So what should its wizards allow you to produce? My list would be:
  • Time control
  • Screen Overlays
  • Functionality producing usable maps e.g. color palettes that avoid color blindness issues
  • Simple sketchup models such as a photo billboard
  • Region controls
as well as enhancements to editing tools that are already available in GEarth such as better polygon digitising controls.
Flash Editor for Google Earth? So why haven’t I mentioned tours yet? Well, I think the analogy here is with FutureSplash Animator (later ‘Flash’) released by Macromedia in 1996 which was a timeline based tool for producing animations on the web. It pre-dated Macromedia Dreamweaver and was kept separate. To me, it makes sense that a Google Earth tour is an animation so it needs a separate animation editing tool that is timeline based, I explain in more detail here (although I discuss it by comparison Captivate, another timeline based tool).
So Why aren’t you Building these programs then? because if I did, and it was a sucess, a certain company ending with ‘Oogle’ and beginning with ‘G’ would bring out a rival and completely blow me out of the water. Instead this is a lazy web request.

Help rebuild L’Aquila

The city of L’Aquila, Italy was turned to rubble by a powerful earthquake in April of 2009. As is the case with many natural disasters, public attention has steadily declined since the earthquake. A year and a half later, little progress has been made to rebuild this ancient city.

So we decided to offer help in the best way we know how: with technology.

As we outlined in this post, employees from the Google SketchUp team offered to assist in the effort. Workshops were held to collect photographs and train local volunteers in the use of SketchUp as a geo-modeling tool.

While this was happening, we were collecting aerial imagery that would enable us to make L’Aquila available to geo-modelers around the world in Google Building Maker.

With L’Aquila now available in Building Maker, we’ve organized a follow-up workshop where Google staff will return to work with volunteers to model the city. The workshop is scheduled for January 22-23 at the University of L’Aquila. Seating is limited. Register here if you would like to attend.

Of course, not everyone who may be interested in volunteering can attend, so we’d like to invite geo-modelers around the world to join us virtually. In addition to supporting a good cause, geo-modelers who join the effort will be awarded a special badge in the Google 3D Warehouse.

Visit the L’Aquila 3D website to learn more about the project.

To get started, follow these simple steps:

  • Watch these helpful getting started videos
  • Launch Building Maker
  • Select “L’Aquila” from the list of available cities
  • Zoom into the city and find a building of interest. Tip: be sure to avoid buildings that are currently being modeled by others by looking for blue dots.
  • When you’ve finished your model, publish it to the 3D Warehouse. If it passes our review, it will appear in the 3D Buildings layer of Google Earth within a week or two, depending on the volume of models.

Augmented Reality for SketchUp

The first time I saw Augmented Reality in action, I wondered if I’d accidentally fallen through a wormhole on the way to work; it’s the kind of thing you’d expect to see on Boba Fett’s BlackBerry. AR is downright futuristic.

In the 3D modeling sense, AR involves combining a live video stream with a 3D model to create the illusion that the model is a physical object in the real world. All you need is a webcam (the ones that are built in to many laptops work just fine), a 3D model (SketchUp takes care of that), a printed-out paper “target” and a piece of AR software that can put everything together. This video shows AR in action:

And here’s an illustration that shows the setup:

A simple Augmented Reality setup for SketchUp, using an external monitor to show the video output.

Thanks to an Italian outfit called Inglobe Technologies, SketchUp users have been able to ride the AR wave for a while now. They’ve just released version 2 of their AR-media Plugin for Google SketchUp. Three great things about this shiny, happy piece of tech:

  • It’s available for both Windows and Mac OSX.
  • It’s available in three flavors: Free (Personal Learning Edition), Professional Lite and Professional.
  • I was able to use it, which means that it can’t be that hard to figure out.

Start out by grabbing the Quick Start Guide; you’ll find the relevant links about halfway down the plugin’s webpage. Follow Steps 2 and 3 to download and install the software; the free Personal Learning Edition will let you see how everything works without spending any money. After that, achieve instant gratification (my favorite kind) by skipping ahead to Step 6 in the Quick Start Guide: “Creating your first Augmented Reality Scene”.