Nokia X7 Testing

A Tough Phone built for the Wild West….
Testing of the New Nokia X7 is going well, impressed with the solid build and speed of the new operating system.

Nokia X7 Testing
Stands out with a 4-inch AMOLED Screen – 8 megapixel Camera creates an impressive 3264 x 2440 pixels image (image from http://noknok.tv/) great for viewing HD videos and Photos.
The Nokia X7 is the only smartphone with a large Nokia 4-inch screen. The larger screen means movies come to life and playing games is a great deal more immersive [tested].
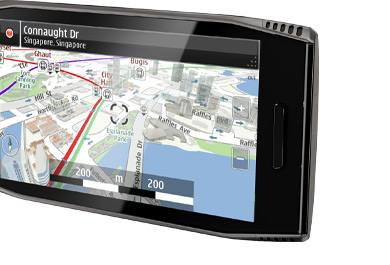
Screen size also views maps and navigation effortlessly. No QWERTY keyboard (uses the virtual keyboard sans input) then the Nokia X7 is the way to go.

#NokiaUnfenced Nokia X7 Testing

Symbian Anna Operating System
Symbian Anna is the latest version of the Symbian installed on the Nokia X7, delivering a faster and smoother user experience, quicker load times and a host of new features. Comes with a 680 MHz processor.
Unique Design and Solid Build.

If you like a solid metal feel to your phone own the Nokia X7. Too many smartphones simply look.The Nokia X7 is all about standing out from the crowd with its opt-angular sided styling. It’s a winner.

New Nokia Maps (3.08) Reviewed
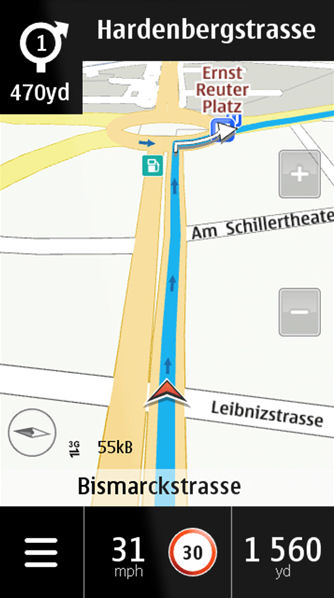
This comes with a new version of Nokia Maps, 3.08. which brings a number of changes to the Drive (car navigation) functionality of the application. The new feature is the ab

utility to use live traffic information to automatically re-route you around traffic delays. New look and feel to the user interface ( have added “Just drive” mode), This version has can set a contact as a destination and an easier to use settings menu. The new beta also marks the brand switch from the Ovi Maps back to Nokia Maps.
Nokia Maps 3.08 beta is available for all Symbian 3 devices: Nokia N8, Nokia C7, Nokia C6-01, Nokia X7, Nokia E6 and Nok

ia E7.

New Nokia Maps 3.08 Reviewed

Faster Nokia Maps – And GPS Fix with assisted GPS is fast under 30 seconds.
(source of image All About Symbian)

Camera – X7 Camera Shots
http://www.flickr.com/photos/gletham/sets/72157627044792323/
by Glenn Letham


http://www.flickr.com/photos/roland/with/5920752728/

and Roland Tanglao

Plastic is dead bring on the stainless steel
Nice design, the age old plastic phones is gone a makes the smartphone sporting and good to hold. The stainless steel of the Nokia X7 adds sturdiness without compromising on weight. Expect a rugged life.
Follow updates throughout the weekend via twitter – #NokiaUnfenced
Big thanks to womworld/1000heads for their organising and hospitality so far. Post will be updated through the weekend.
Map of the Ranch with Photos..

Google Environment: Integrated Mobile Apps


The Google Apps Marketplace is a storefront for Google Apps customers to discover, purchase, deploy and manage web applications which are integrated with Google Apps. These applications are typically used from desktops and laptops, but many vendors on the Apps Marketplace have also optimized the experience for their users who are on-the-go. There are several different strategies for enabling a mobile workforce, and each requires a different approach to authentication and authorization.

Lightweight: Synchronize Contacts, Calendars and Docs with Google Apps

Google has written applications and synchronization clients to help ensure that the core Google Apps data is available to users on their mobile devices, whether they’re on their mobile phones or tablets. By storing contacts, dates and documents from your application in Google Apps using the application APIs, you can leverage these features to provide a mobile view for your users.

Since you’re only accessing the application APIs on your web application’s server, and the user has already linked up their mobile device to their Google account, there are no special techniques for authentication and authorization when using this lightweight approach.

Standards-based: Build a mobile-optimized web application

With the latest advances in HTML5 web technologies such as offline and local storage, it’s possible to build mobile interfaces for business apps which are full-featured and accessible to users on many devices. The primary goal in building the mobile web application is to optimize the user experience for different input devices, form factors and limitations in network availability and bandwidth.

Because the application is in a web browser, most of the changes to implement are in the frontend– HTML, JavaScript and CSS. User authentication and data authorization continue to use the same OpenID and OAuth technologies as are used for the desktop/laptop version of the application.

Device-custom: Build native companion apps for mobile devices

Does your application need access to hardware-specific APIs which are not available in a web browser, or do you feel a great user experience can only be achieved using native code? Several Apps Marketplace vendors have built native applications for popular mobile platforms like Android and iOS. Although it takes considerably more effort to build multiple native applications to cover the major platforms, these vendors can also take advantage of the additional distribution channels offered by mobile stores.

Authentication and authorization are often challenging for developers building native mobile applications because they cannot simply ask users for a password if their app supports single-sign on to Google with OpenID. We recently published an article describing a technique using an embedded webview for accomplishing OpenID authentication in mobile apps. This article includes references to sample code for Android and iOS.

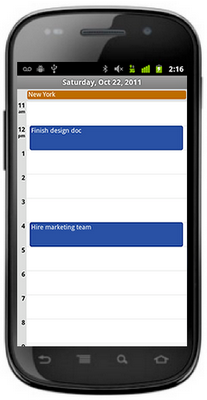
Many Project Management applications, like Manymoon, store important dates on Google Calendar. These dates are then available on mobile devices.

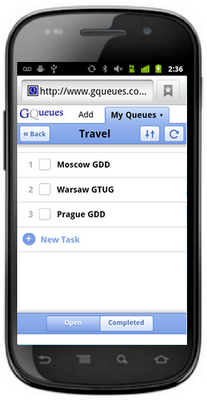
GQueues has a HTML5 mobile app. Their founder has written about why they used this technique.


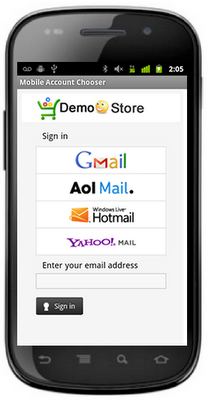
Native applications, such as the OpenID Sample Store displayed, can use an embedded webview to authenticate users.

GoogleCodeNews

OAuth 2.0, Python & Google Data APIs


Since March of this year, Google has supported OAuth 2.0 for many APIs, including Google Data APIs such as Google Calendar, Google Contacts and Google Documents List. Google’s implementation of OAuth 2.0 introduces many advantages compared to OAuth 1.0 such as simplicity for developers and a more polished user experience.

We’ve just added support for this authorization mechanism to the gdata-python-client library– let’s take a look at how it works by retrieving an access token for the Google Calendar and Google Documents List APIs and listing protected data.

Getting Started

First, you will need to retrieve or sync the project from the repository using Mercurial:

hg clone https://code.google.com/p/gdata-python-client/

For more information about installing this library, please refer to the Getting Started With the Google Data Python Library article.

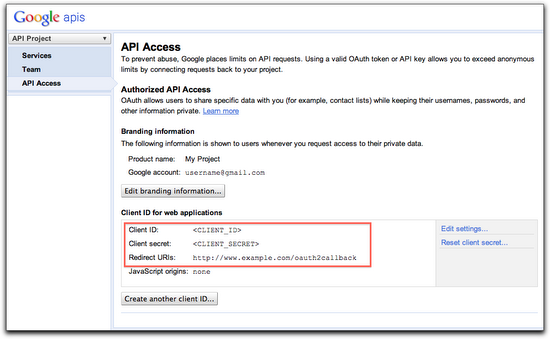
Now that the client library is installed, you can go to your APIs Console to either create a new project, or use information about an existing one from the API Access pane:

Getting the Authorization URL

Your application will require the user to grant permission for it to access protected APIs on their behalf. It must redirect the user over to Google’s authorization server and specify the scopes of the APIs it is requesting permission to access.

Available Google Data API’s scopes are listed in the Google Data FAQ.

Here’s how your application can generate the appropriate URL and redirect the user:

import gdata.gauth

# The client id and secret can be found on your API Console.
CLIENT_ID = ''
CLIENT_SECRET = ''

# Authorization can be requested for multiple APIs at once by specifying multiple scopes separated by # spaces.
SCOPES = ['https://docs.google.com/feeds/', 'https://www.google.com/calendar/feeds/']  
USER_AGENT = ''

# Save the token for later use.
token = gdata.gauth.OAuth2Tokens(
   client_id=CLIENT_ID, client_secret=CLIENT_SECRET, scope=' '.join(SCOPES),
   user_agent=USER_AGENT)

# The “redirect_url” parameter needs to match the one you entered in the API Console and points
# to your callback handler.
self.redirect(
    token.generate_authorize_url(redirect_url='http://www.example.com/oauth2callback'))

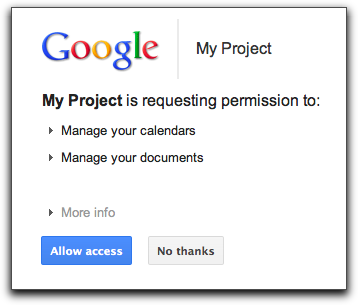
If all the parameters match what has been provided by the API Console, the user will be shown this dialog:

When an action is taken (e.g allowing or declining the access), Google’s authorization server will redirect the user to the specified redirect URL and include an authorization code as a query parameter. Your application then needs to make a call to Google’s token endpoint to exchange this authorization code for an access token.

Getting an Access Token

import atom.http_core

url = atom.http_core.Uri.parse_uri(self.request.uri)
if 'error' in url.query:
  # The user declined the authorization request.
  # Application should handle this error appropriately.
  pass
else:
# This is the token instantiated in the first section.
  token.get_access_token(url.query)

The redirect handler retrieves the authorization code that has been returned by Google’s authorization server and exchanges it for a short-lived access token and a long-lived refresh token that can be used to retrieve a new access token. Both access and refresh tokens are to be kept private to the application server and should never be revealed to other client applications or stored as a cookie.

To store the token object in a secured datastore or keystore, the gdata.gauth.token_to_blob() function can be used to serialize the token into a string. The gdata.gauth.token_from_blob() function does the opposite operation and instantiate a new token object from a string.

Calling Protected APIs

Now that an access token has been retrieved, it can be used to authorize calls to the protected APIs specified in the scope parameter.

import gdata.calendar.client
import gdata.docs.client

# Access the Google Calendar API.
calendar_client = gdata.calendar.client.CalendarClient(source=USER_AGENT)
# This is the token instantiated in the first section.
calendar_client = token.authorize(calendar_client)
calendars_feed = client.GetCalendarsFeed()
for entry in calendars_feed.entry:
  print entry.title.text
# Access the Google Documents List API.
docs_client = gdata.docs.client.DocsClient(source=USER_AGENT)
# This is the token instantiated in the first section.
docs_client = token.authorize(docs_client)
docs_feed = client.GetDocumentListFeed()
for entry in docs_feed.entry:
  print entry.title.text