The Pictarine: Building a mashup in the cloud with Google App Engine


Pictarine is a photo management web application, launched in 2010, that allows people to easily manage and share all of their photos from Flickr, Picasa, Facebook, Twitter and other sites. Pictarine developers Guillaume Martin and Maxime Rafalimanana have contributed the following post discussing their experiences using Google App Engine and Google Web Toolkit.

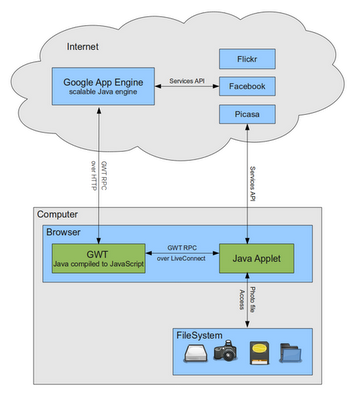
From the start, we used Google technologies in developing Pictarine and we wanted to share our experience with them so far. In this post, we will shed some light on the weaknesses and strengths we found in Google Web Toolkit (GWT) and Google App Engine. We will also discuss how we leveraged GWT to build a new technology that allows Pictarine to seamlessly display photos from the computer directly into the browser. The following diagram is an overview of how our application works.

Building a mashup in the cloud with Google App Engine

The Pictarine team is made of a web designer and two developers who previously worked mainly with Java based enterprise technologies and had a little experience with web technologies. When we started the project in early 2009, we were quite open on learning new languages like Python or Ruby, but when App Engine announced that Java would be supported, we were really excited to give Google App Engine a try.

The first few months, learning about the App Engine environment was quite easy and dare I say fun. Testing our code on Google’s servers from Eclipse IDE was only one click away. So we built our first prototype fast and we quickly decided to adopt App Engine. Then we started to build the core of our application: the engine that uses the API from Flickr, Picasa, Facebook to fetch the users’ photos. This is where we hit the first limitations of App Engine. Most users have a lot of photos on these services and retrieving them can take some time. But App Engine has strict limits on how long a request should last: an outgoing HTTP request cannot last more than 10 seconds and cannot process a request for more than 30 seconds. So while building our architecture we found ourselves writing approximately one third of our code dealing with these limitations: paginating our requests, creating background tasks to store data in small batches, etc.

In early 2010, when we launched our alpha version, everything went smoothly. We had some good press coverage and App Engine met our expectations in handling our first users. During 2010, we worked on implementing new features requested by our users, and during this period of time we were really impressed by the way App Engine evolved. Many of the limitations were lifted and great new features were added. We are now able to use Task Queues for requests that last up to 10 minutes, which we fully use to sync our users’ photos and albums. One of the features we like the most is the Channel API, a push notification system that allows us to instantly show a photo in every connected browser as soon as it is uploaded.
App Engine is still not perfect but has greatly improved and when we see its roadmap, we are quite confident it will continue to improve.
SketchUp: Speed Up Using Fast Styles

You might not realize that the display settings you choose to apply to your models can affect SketchUp’s speed and general responsiveness. Turning on fancy edge effects and other doodads will slow you down when your model gets big.

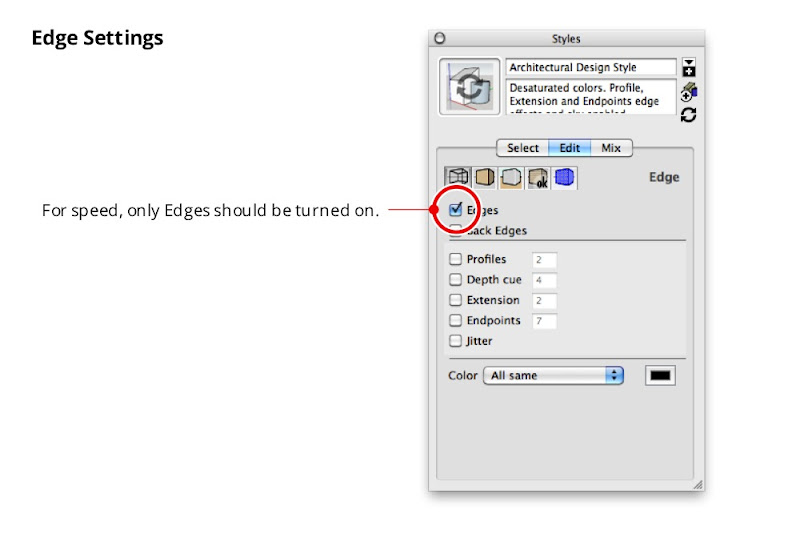
When you’re working on a big model, you want to make sure that you’re using a style whose Edge Settings panel looks like the one in the image below. Everything but “Edges” should be turned off.

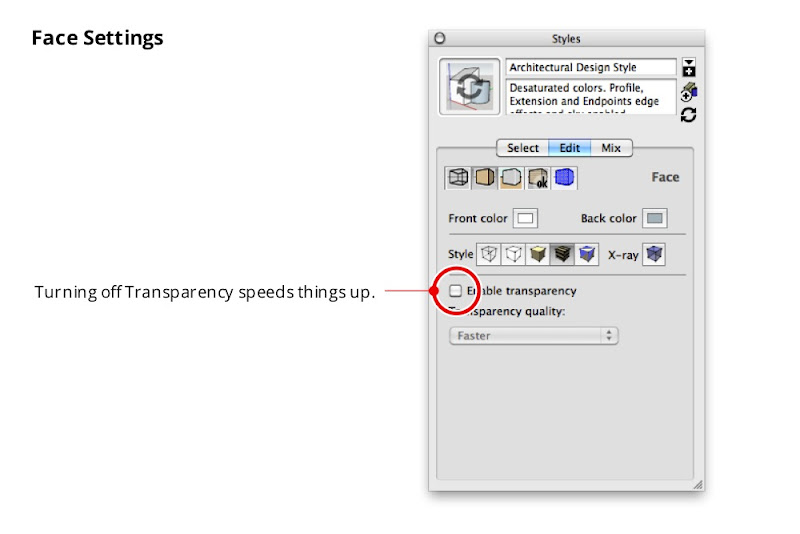
The Face Settings panel is where you can choose not to display Transparency. When Transparency is turned on, SketchUp has to redraw your model on the screen several times—each time you change your viewpoint. If you don’t need to see through your windows just now, opt to temporarily view these faces without transparency.

The Background Settings panel is handy for turning off Sky and Ground, both of which cause your computer to do extra thinking while you’re working.

Unless you absolutely need them, you should use the checkbox in the Watermark Settings panel to turn off Watermarks.

The only toggles in the Modeling Settings panel you really need to worry about are the ones for Hidden Geometry and Section Planes. Obviously, you shouldn’t have wither of these displayed if speed is what you’re aiming for.


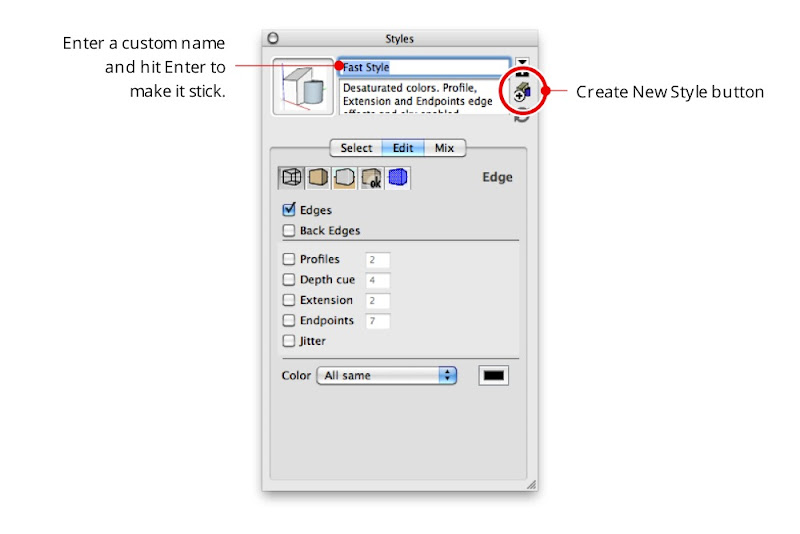
Once you’ve configured your own fast style, you should save it. Just give it a new name (I suggest “Fast Style”), hit Enter, and click the Create New Style button in the Styles Browser. You new style is saved in the “In Model” collection of styles, which is only associated with the model you’re currently working on.

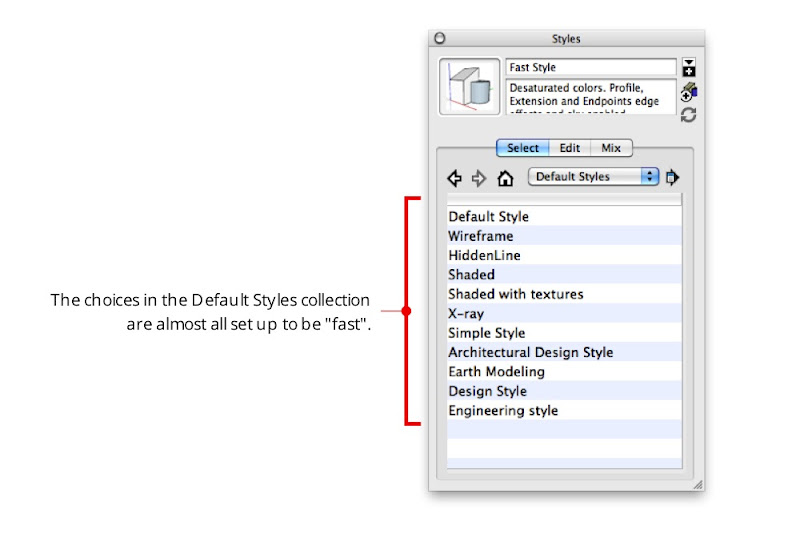
Incidentally, almost all of the choices in SketchUp’s Default Styles collection are so-called “Fast styles” — their Edge Display settings are already configured for speed. Choosing any one of these styles will switch off extraneous effects.

Make a Fast Scene

True SketchUp whizzes invariably go one step further and add a special “Fast” scene that they can activate whenever they need to. Rather than having to mess with the Styles Browser every time they want to activate their Fast Style, they just click a scene tab at the top of the modeling window. This Fast scene is usually set up to do three things: Switch to a Fast style, turn off Shadows, and turn off Fog.

Follow these steps to add a Fast scene to your model:

  1. Apply a Fast style to your model by choosing it from the Style Browser’s Select tab.
  2. Make sure Shadows and Fog are both turned off. These toggles are in the View menu.
  3. Choose Window > Scenes to open the Scenes Manager.
  4. Expand the Scenes Manager by clicking the Show Details button in the upper right corner.
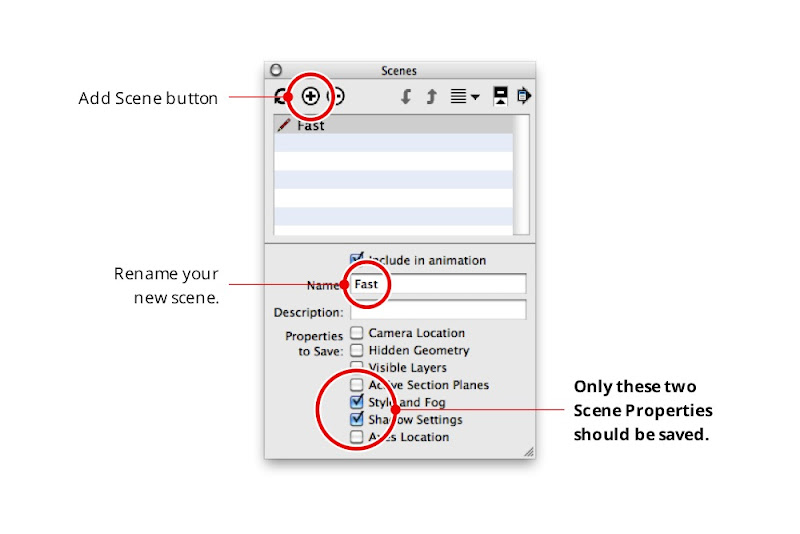
  5. Click the Add Scene button to add a new scene to your model.
  6. Rename your new scene “Fast” (or something similarly descriptive) and hit Enter on your keyboard.
  7. Make sure that only the “Style and Fog” and “Shadow Settings” checkboxes are selected in the Properties to Save section of the Scenes Manager.

Google Environment: Integrated Mobile Apps


The Google Apps Marketplace is a storefront for Google Apps customers to discover, purchase, deploy and manage web applications which are integrated with Google Apps. These applications are typically used from desktops and laptops, but many vendors on the Apps Marketplace have also optimized the experience for their users who are on-the-go. There are several different strategies for enabling a mobile workforce, and each requires a different approach to authentication and authorization.

Lightweight: Synchronize Contacts, Calendars and Docs with Google Apps

Google has written applications and synchronization clients to help ensure that the core Google Apps data is available to users on their mobile devices, whether they’re on their mobile phones or tablets. By storing contacts, dates and documents from your application in Google Apps using the application APIs, you can leverage these features to provide a mobile view for your users.

Since you’re only accessing the application APIs on your web application’s server, and the user has already linked up their mobile device to their Google account, there are no special techniques for authentication and authorization when using this lightweight approach.

Standards-based: Build a mobile-optimized web application

With the latest advances in HTML5 web technologies such as offline and local storage, it’s possible to build mobile interfaces for business apps which are full-featured and accessible to users on many devices. The primary goal in building the mobile web application is to optimize the user experience for different input devices, form factors and limitations in network availability and bandwidth.

Because the application is in a web browser, most of the changes to implement are in the frontend– HTML, JavaScript and CSS. User authentication and data authorization continue to use the same OpenID and OAuth technologies as are used for the desktop/laptop version of the application.

Device-custom: Build native companion apps for mobile devices

Does your application need access to hardware-specific APIs which are not available in a web browser, or do you feel a great user experience can only be achieved using native code? Several Apps Marketplace vendors have built native applications for popular mobile platforms like Android and iOS. Although it takes considerably more effort to build multiple native applications to cover the major platforms, these vendors can also take advantage of the additional distribution channels offered by mobile stores.

Authentication and authorization are often challenging for developers building native mobile applications because they cannot simply ask users for a password if their app supports single-sign on to Google with OpenID. We recently published an article describing a technique using an embedded webview for accomplishing OpenID authentication in mobile apps. This article includes references to sample code for Android and iOS.

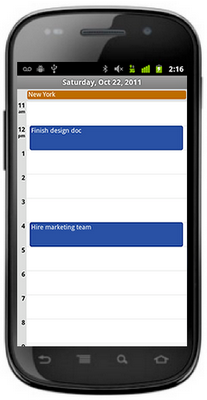
Many Project Management applications, like Manymoon, store important dates on Google Calendar. These dates are then available on mobile devices.

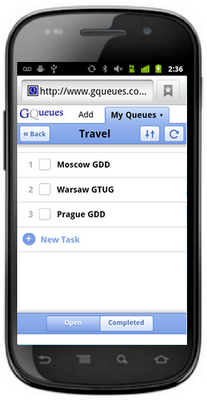
GQueues has a HTML5 mobile app. Their founder has written about why they used this technique.


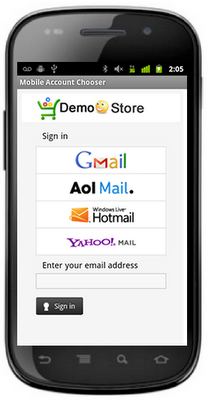
Native applications, such as the OpenID Sample Store displayed, can use an embedded webview to authenticate users.

GoogleCodeNews